A guide for photographers
Scenes in Visuals.
From files to a finished gallery.
Create sections for your shoot, arrange the photos, choose covers and send your client straight to the scene they need. We walk through the whole process in the photographer’s workspace.
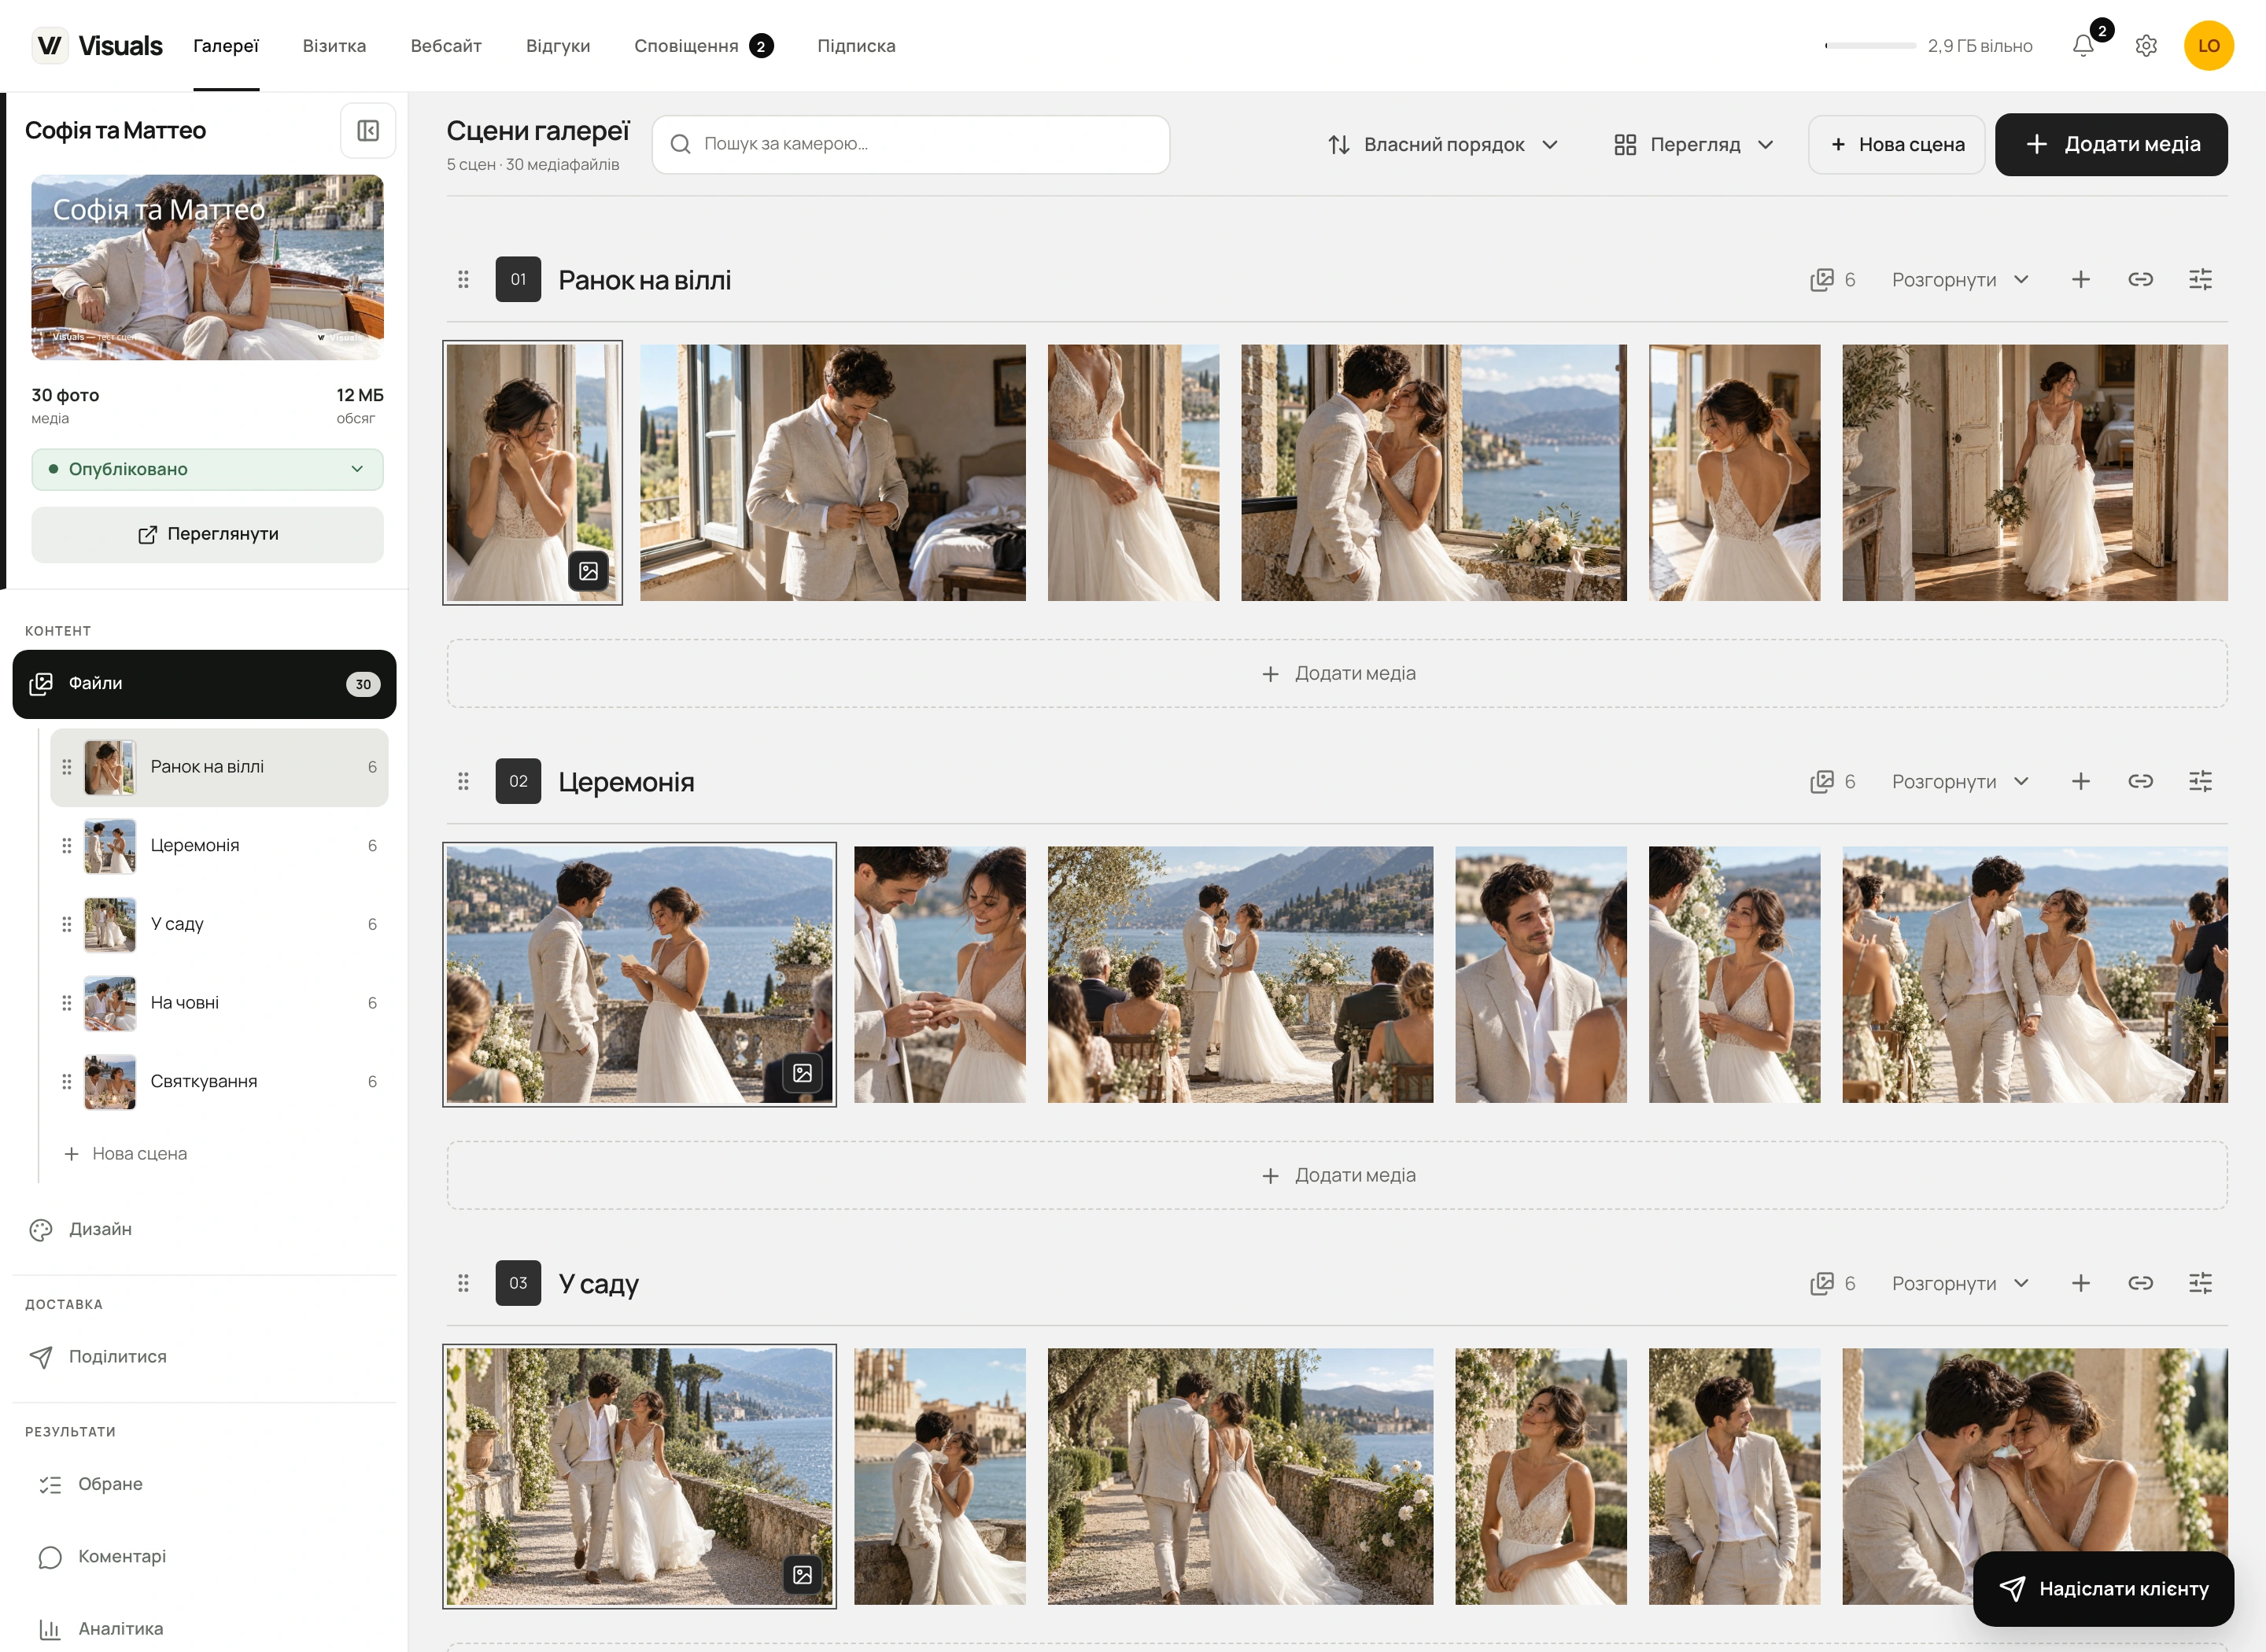
A morning at the villa, the ceremony, a walk, a boat ride and the celebration. Scenes bring these moments together in one gallery with a clear structure. You manage the files and presentation of each section in your workspace; your client gets easy navigation and the option to download the part of the shoot they need.
We have thought through every stage of working with scenes, from choosing a folder on your computer to delivering the finished archive. Here is how to use these tools in a wedding gallery.
In this guide
01Creating scenes
Create your first scene
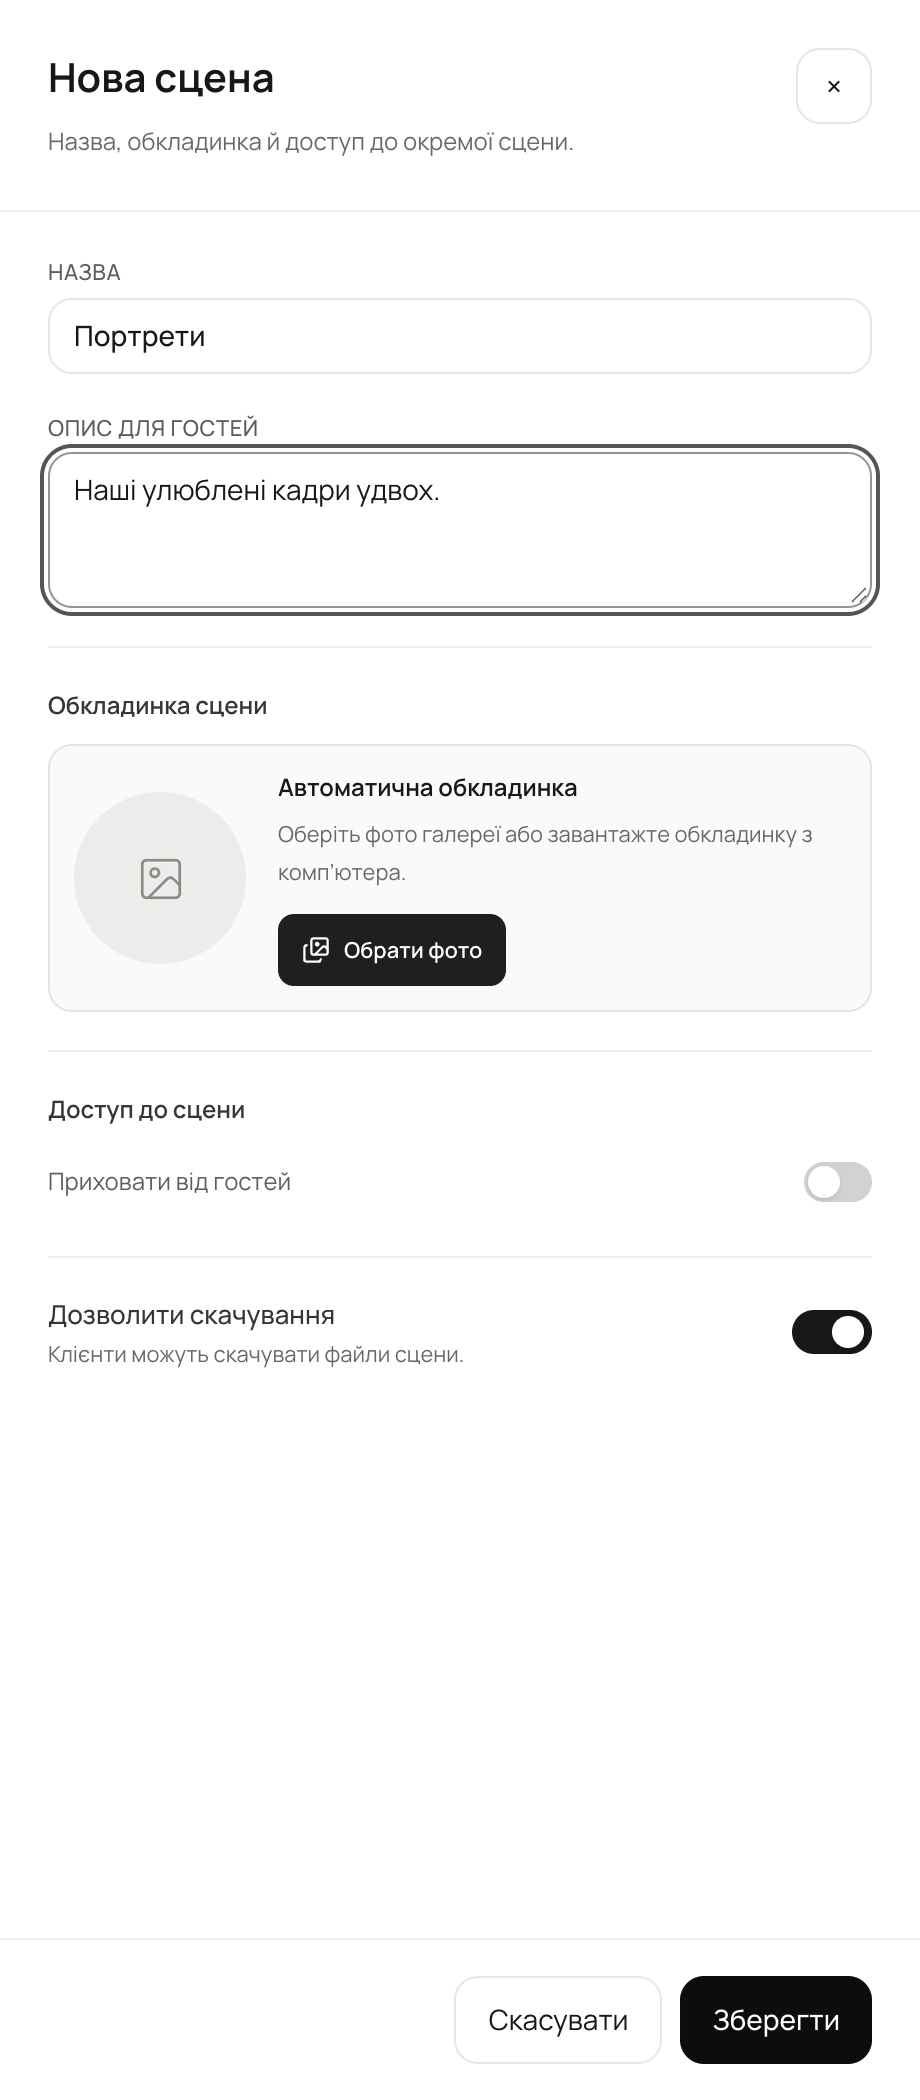
Open a gallery in your workspace and go to “Files”. Each part of the shoot can have its own scene, such as “Ceremony”, “Portraits” or “Celebration”.
- Click “New scene” in the top toolbar or beneath the scene list on the left.
- Enter a name. You can also add a short description for guests.
- Click “Save”. The new scene appears in the workspace and in the sidebar beneath “Files”.
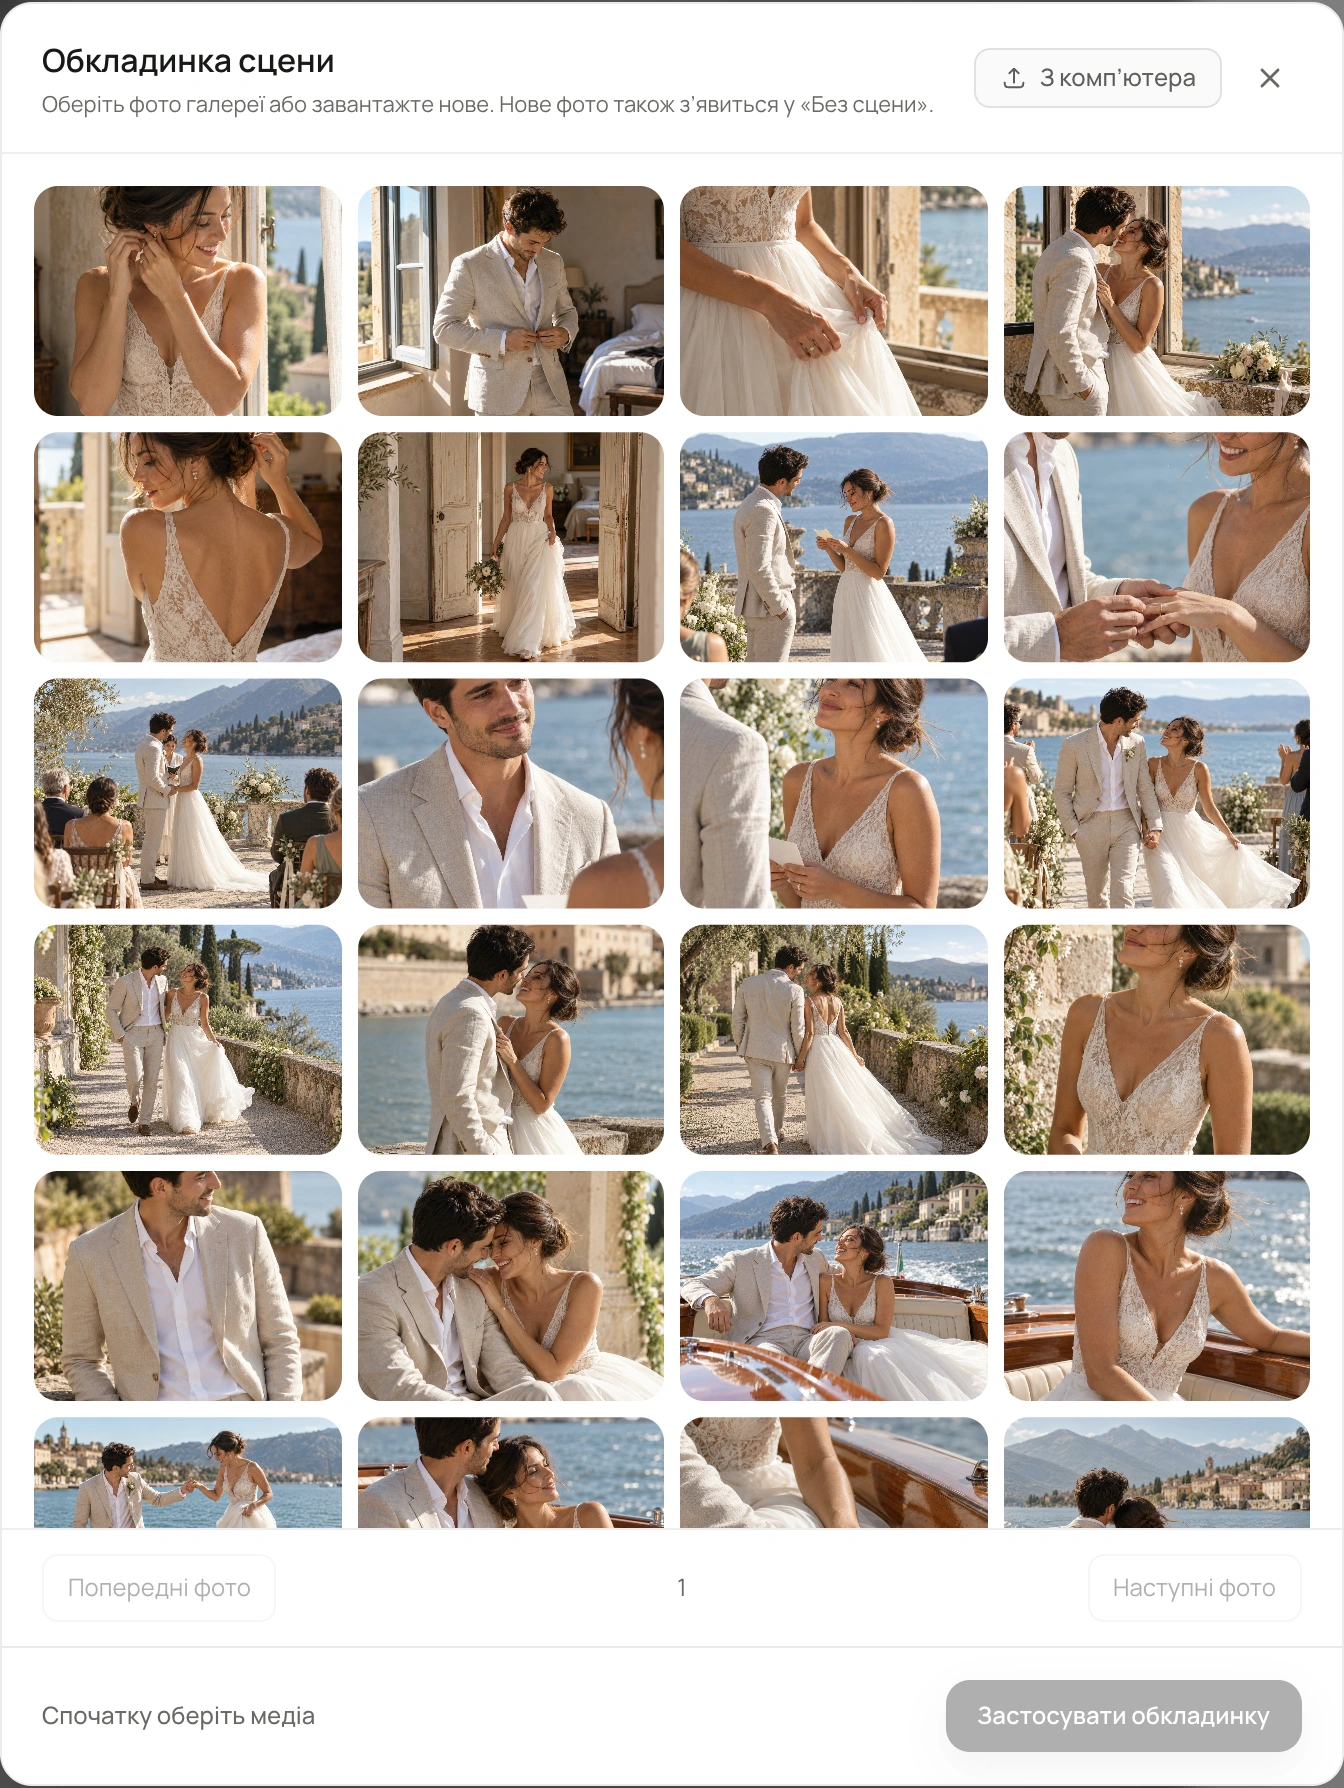
You can choose a cover for an empty scene: pick a photo from the gallery or upload an image from your computer. Adjust the framing and save the scene. Adding more files will not replace a cover you chose manually.
Creating a scene
Screenshots
02Uploading
Add files straight to the right scene
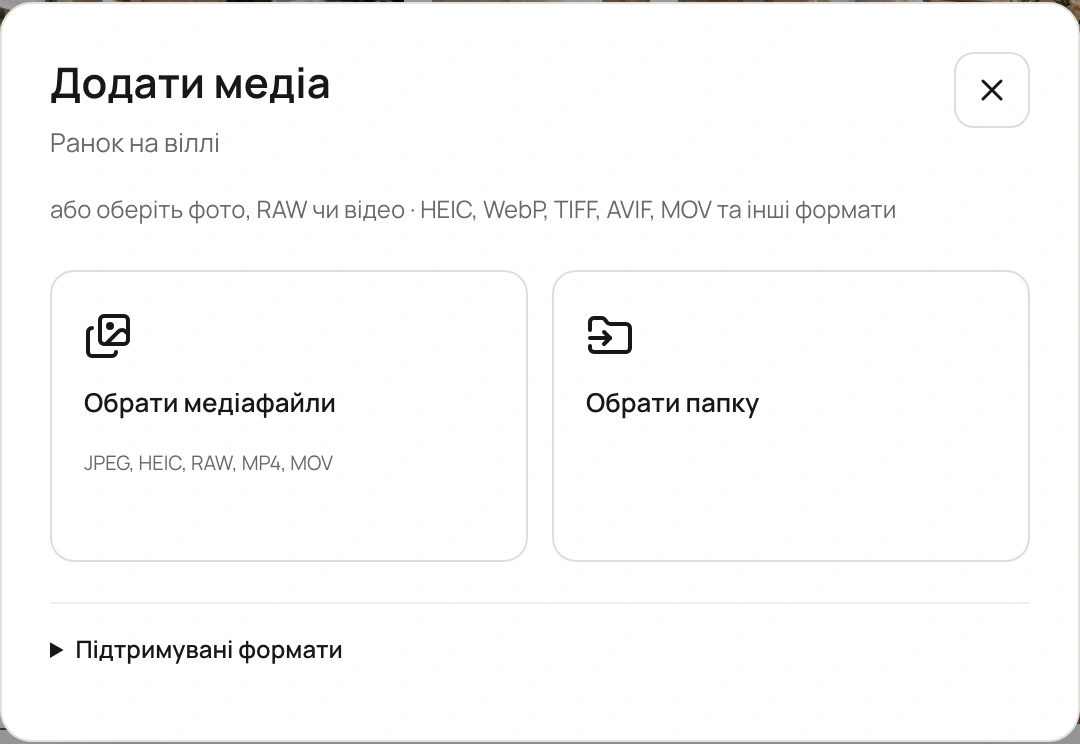
Each scene has a “+” beside its name and “Add media” beneath its photographs. Both open uploads for that section. You can choose media files or a whole folder.
You can also drag new files from your computer onto a scene in the workspace or sidebar. A highlight shows where they will go. File cards appear in the corresponding scene while they upload and process.
Files go straight into the scene
Screenshots
03Moving photos
Move one photo or an entire selection
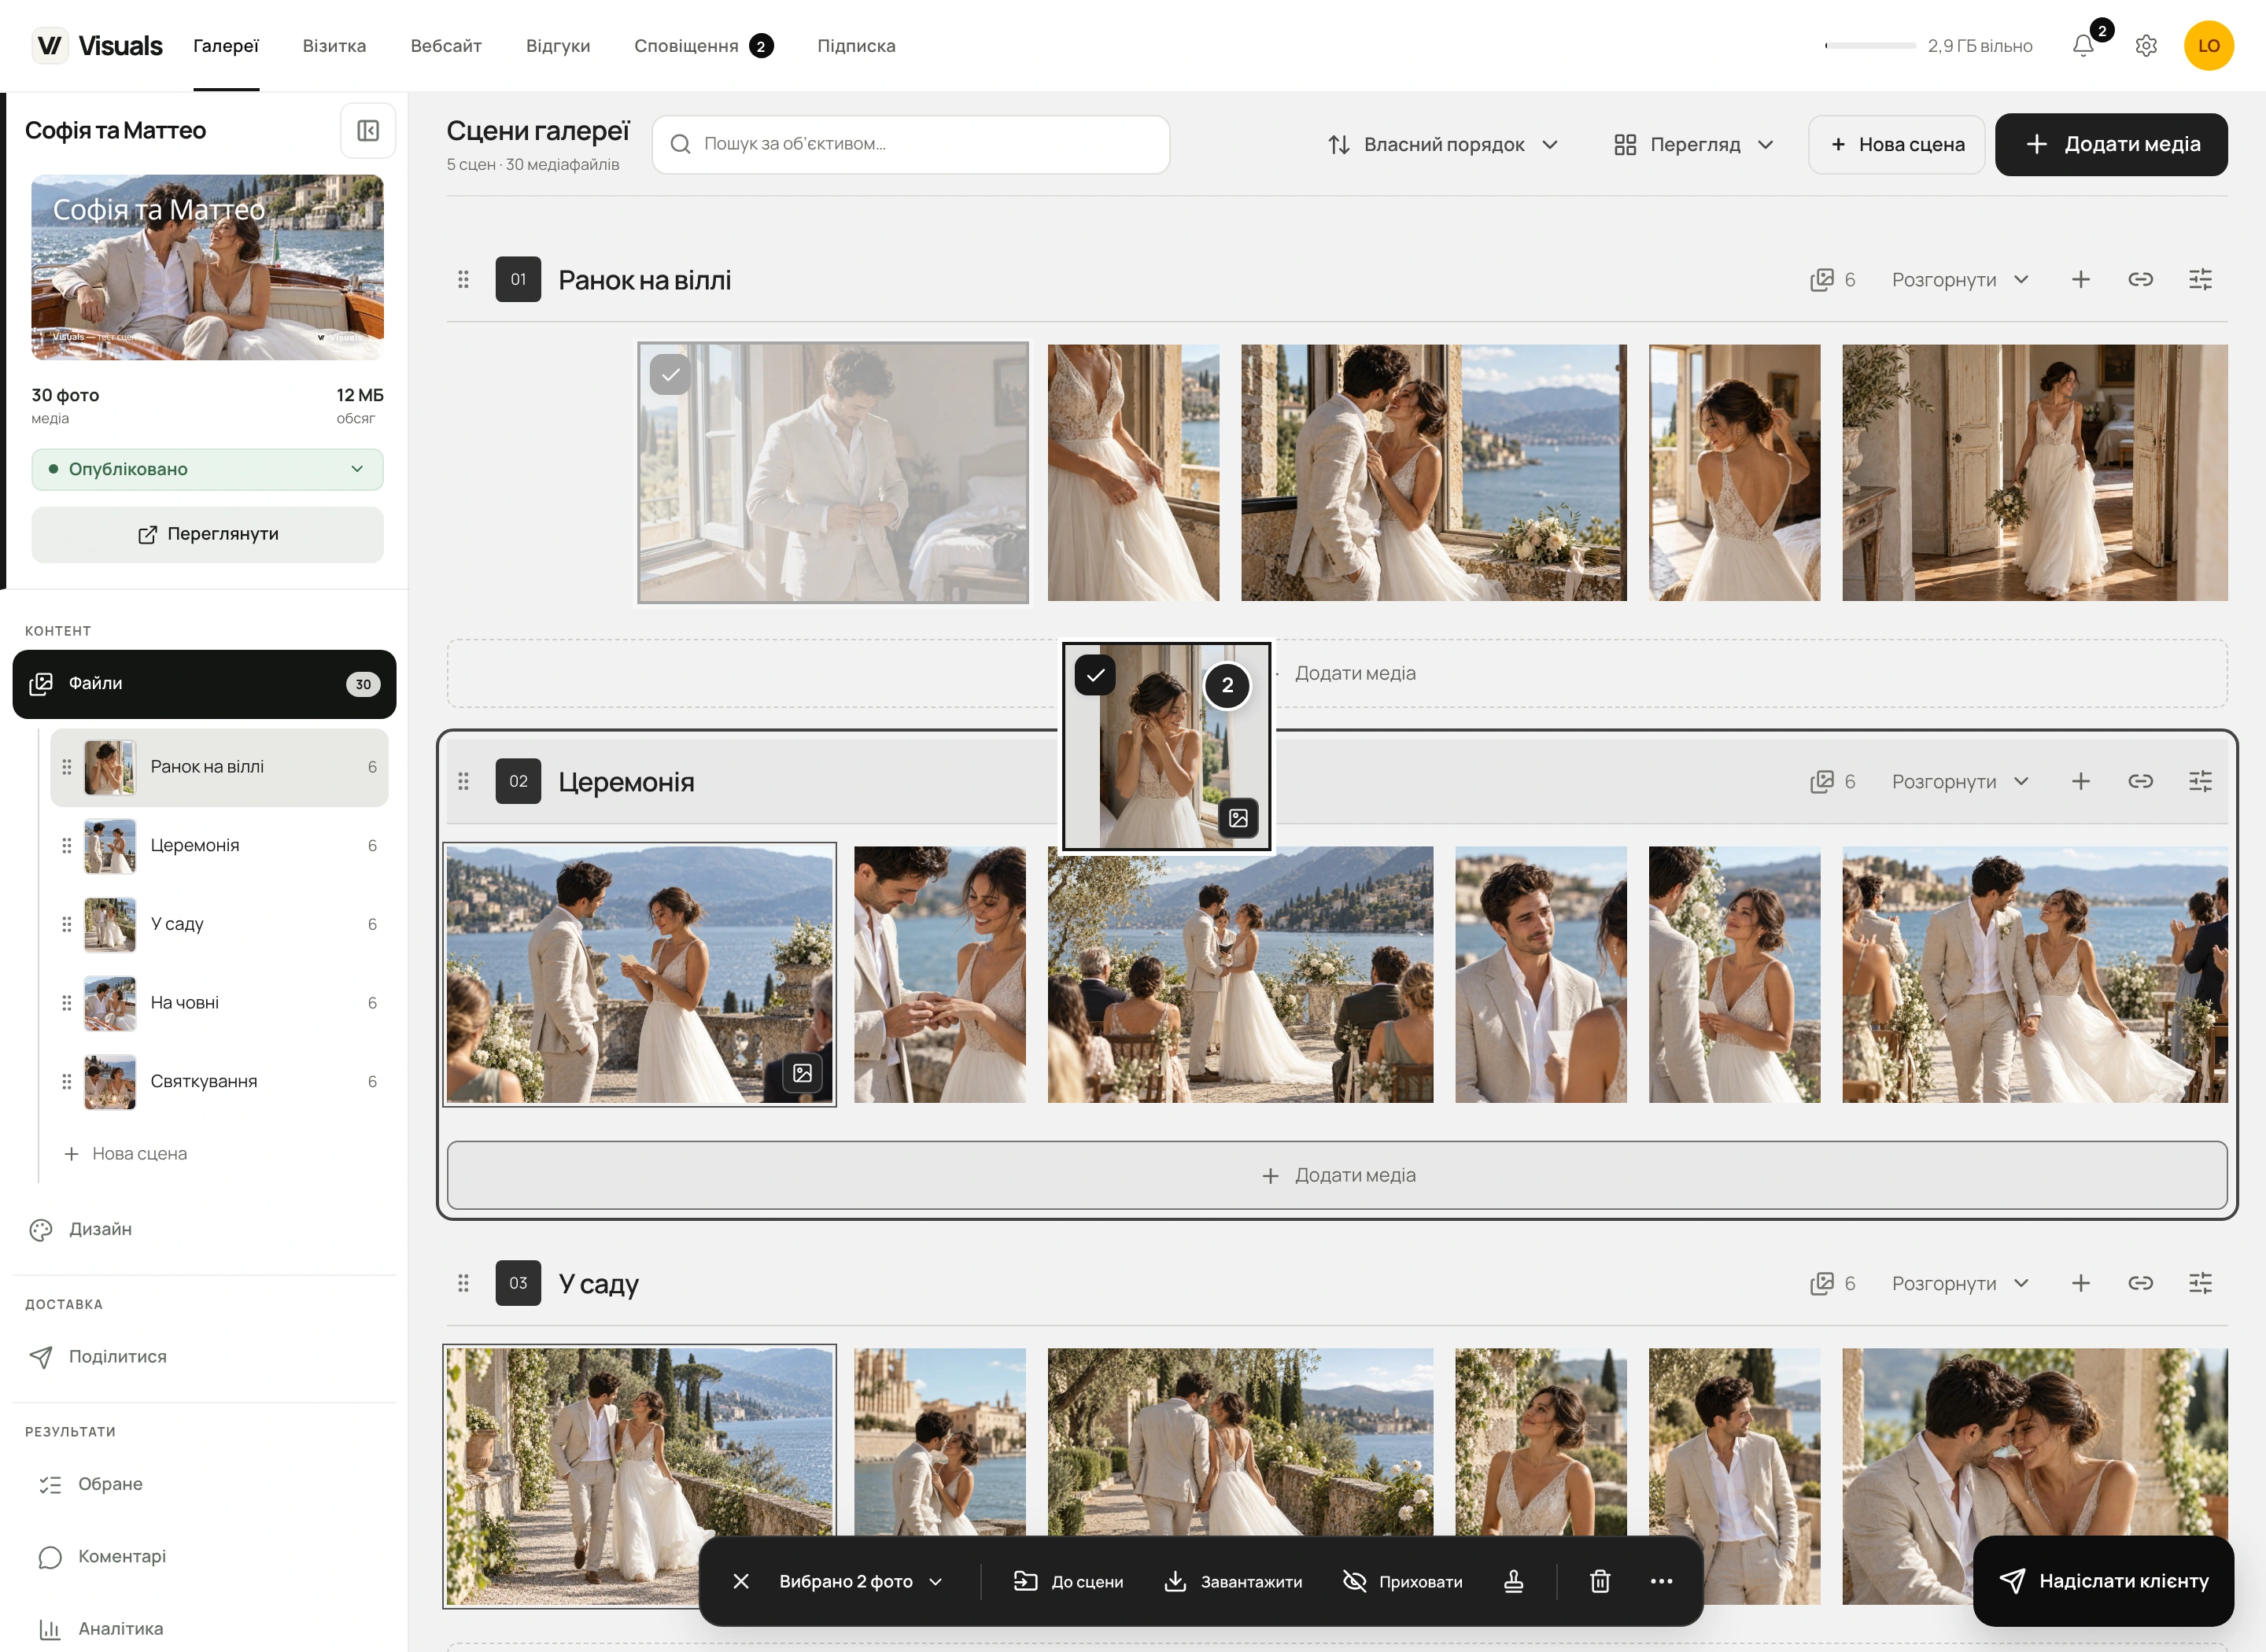
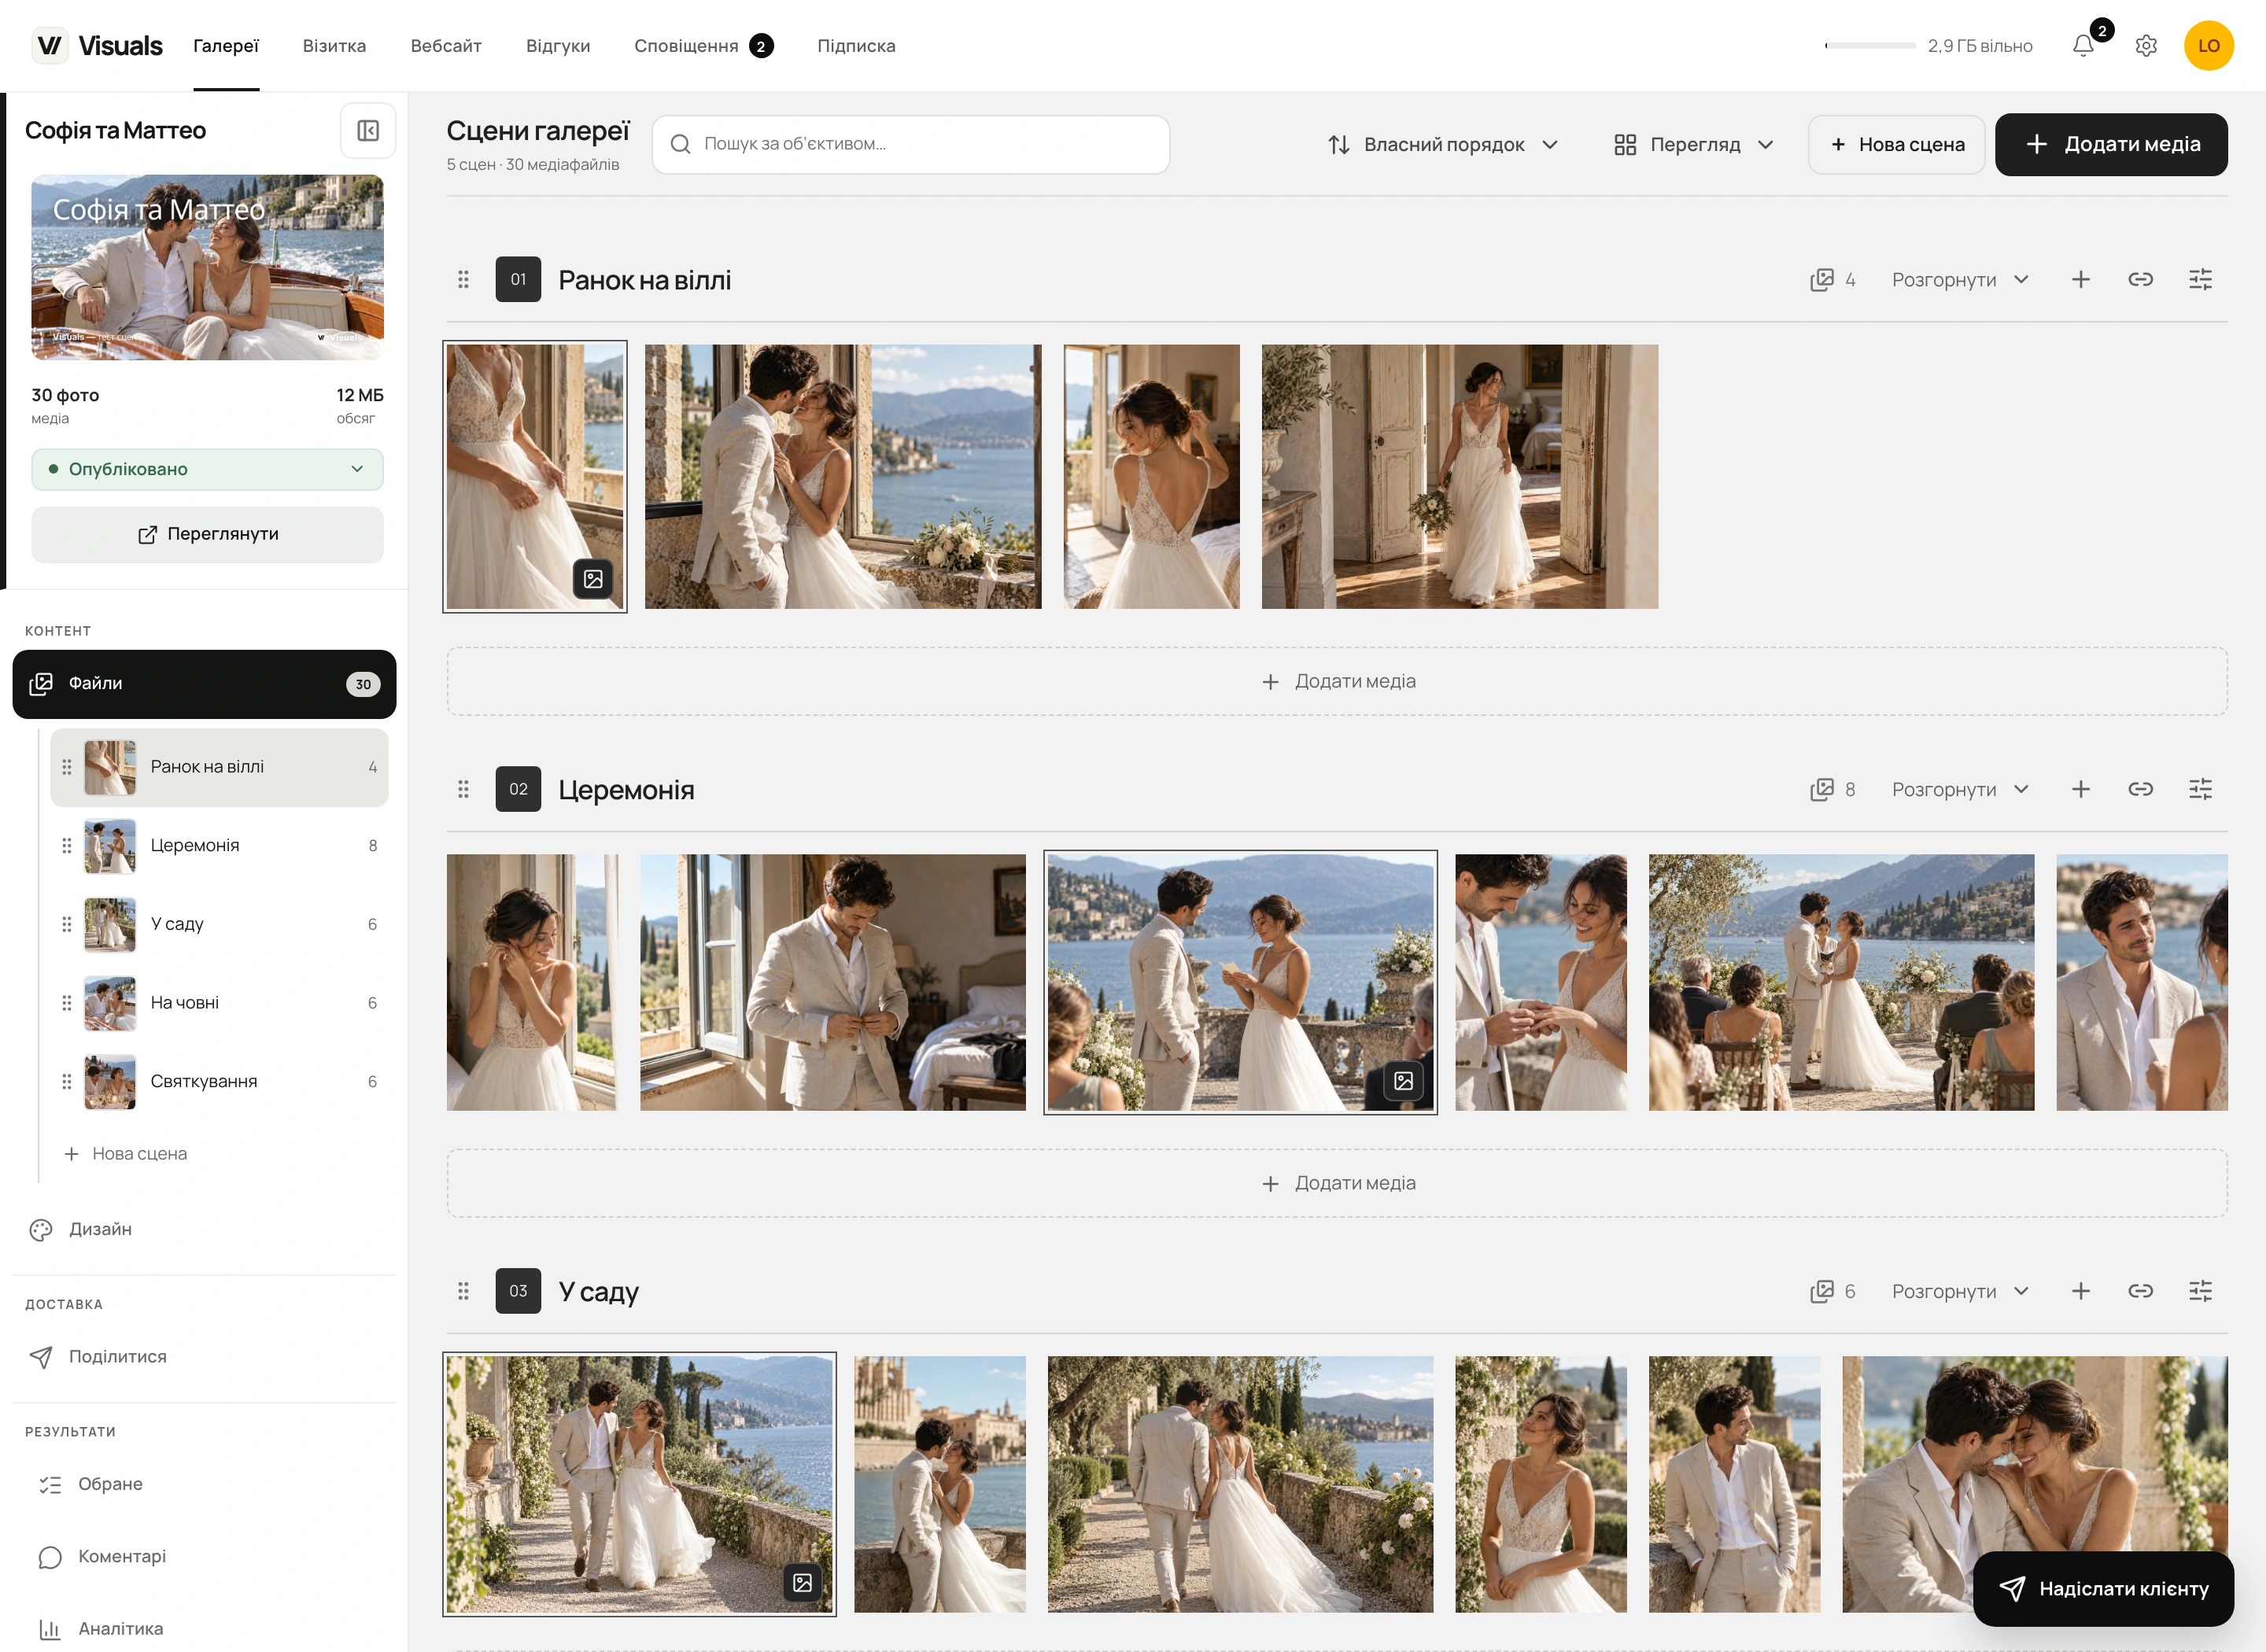
It is easy to change your mind while editing a gallery: a portrait might fit better with the walk, or a few evening photos with the celebration. You can move photos you have already uploaded between scenes right in the workspace.
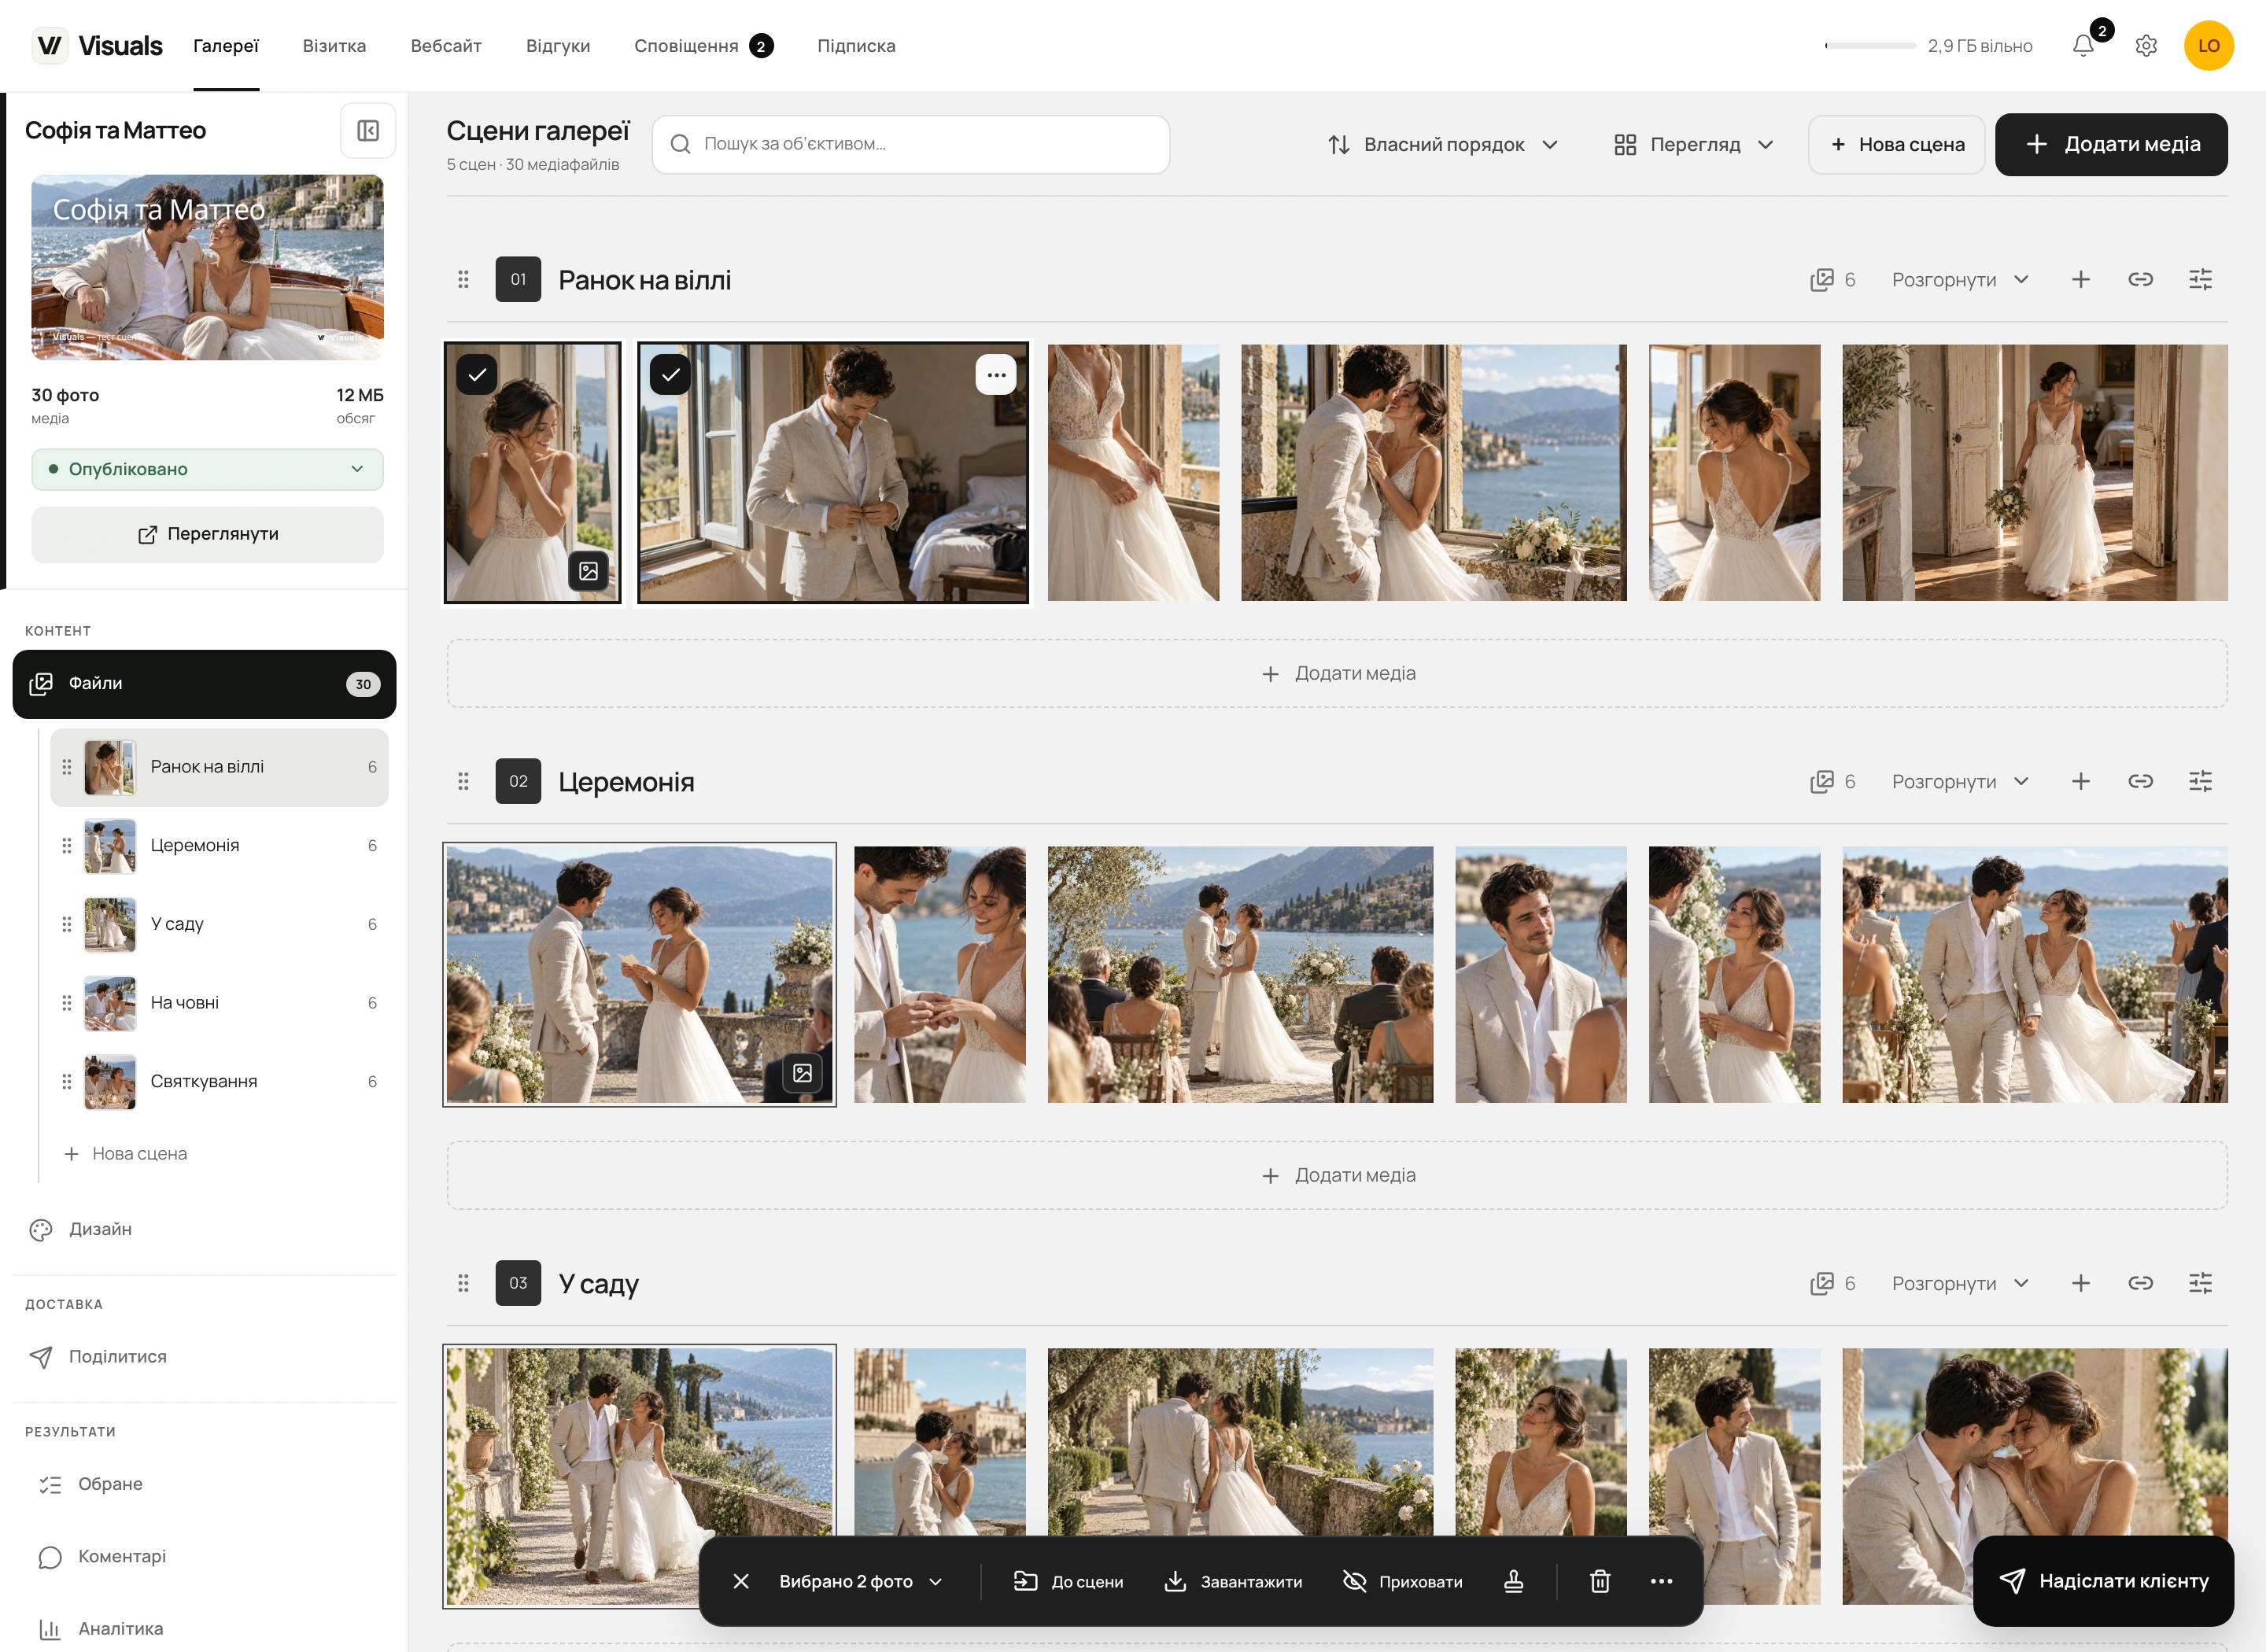
- Select the photos using the checkmarks on their thumbnails. You can choose one photo or several.
- Drag any selected photo to another scene. The interface shows the destination as you drag.
- Release the mouse button. The photos move to the chosen scene and its count updates.
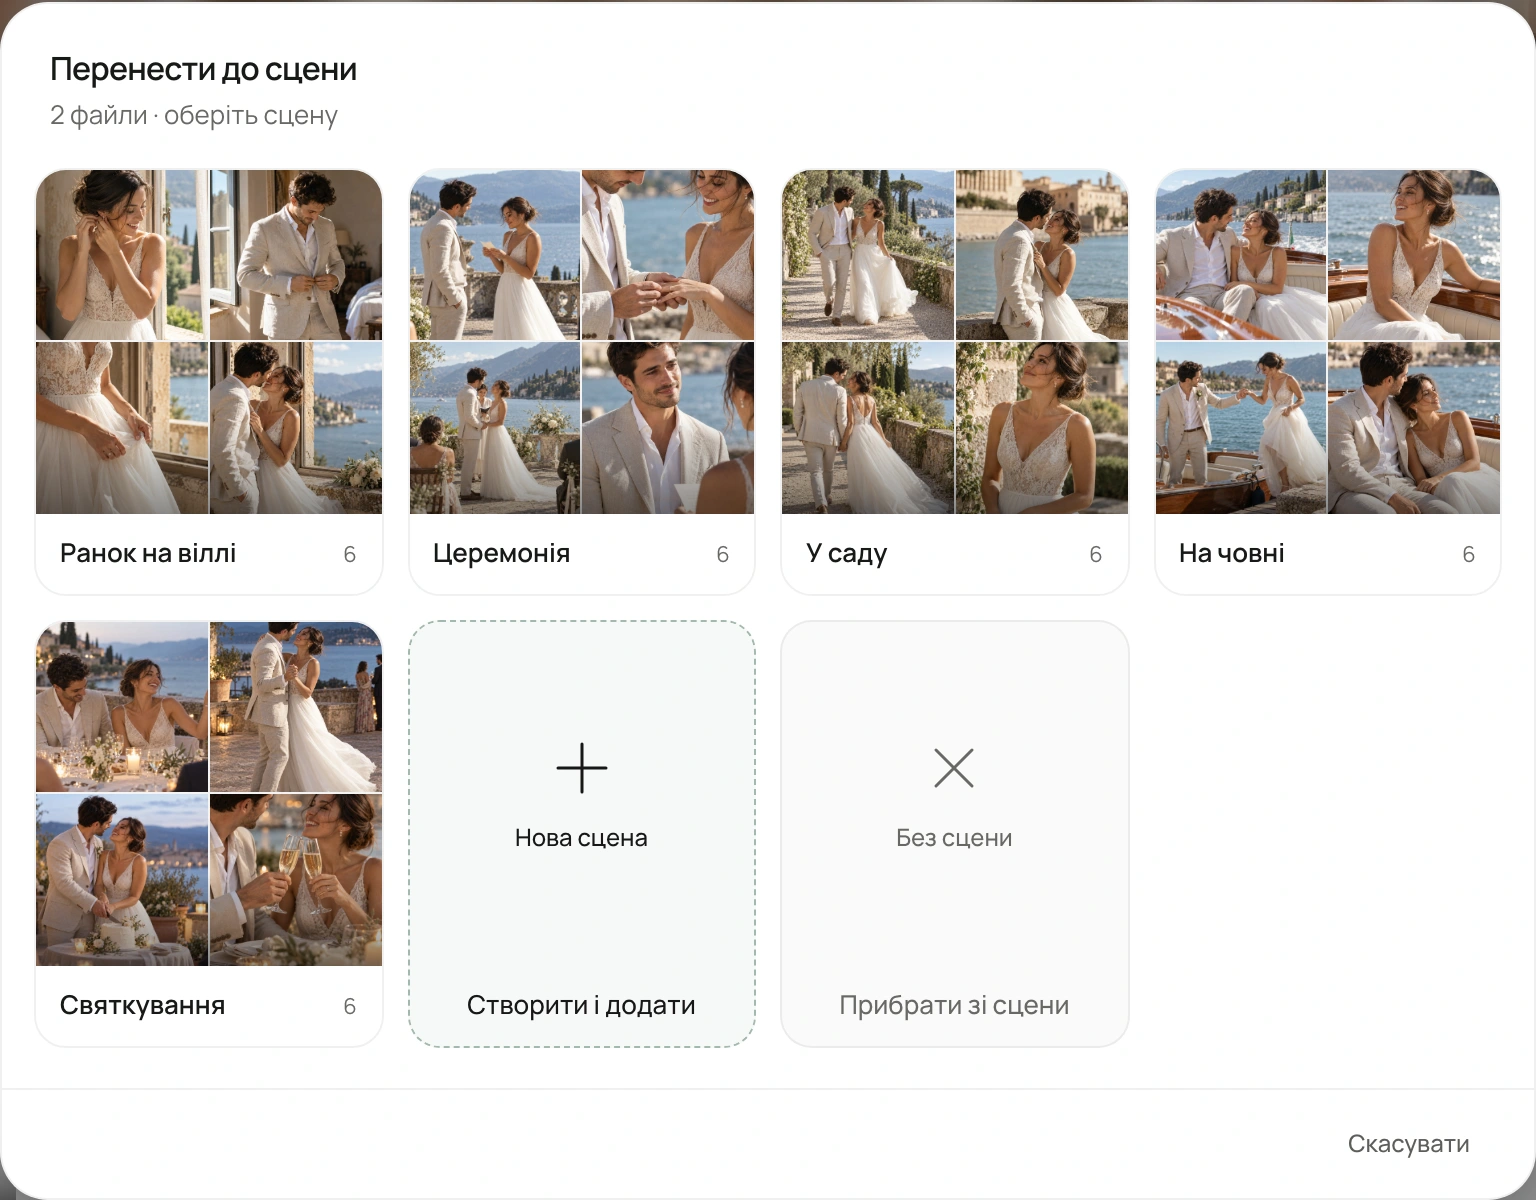
You can also click “To scene” in the selected files’ bottom toolbar and choose a section. From the same menu, create a new scene for the selection or choose “No scene”.
Moving a selection
Step-by-step screenshots

04Ordering
Control the order of scenes and photographs
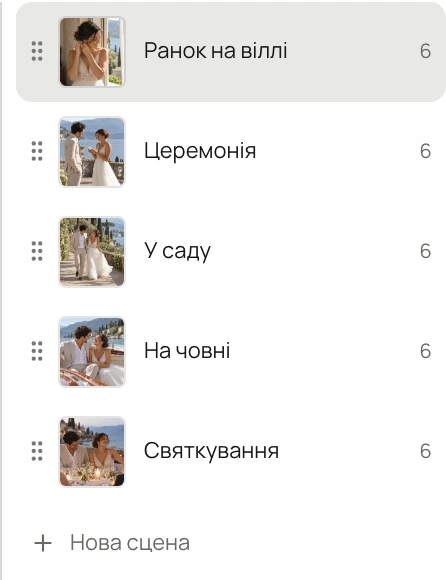
Drag the six-dot handle before a scene’s name to reorder it, either in the workspace or sidebar. This sets the sequence of the whole story: morning first, then the ceremony, the walk and dinner.
Photo order is managed separately. Choose “Custom order” to arrange photos by dragging them within a scene. Sorting by name or date orders the photographs by that setting while keeping them in their scenes.
After a move to another scene, photos follow the gallery’s current order. For a custom sequence, position them within the destination scene. “Expand” shows more photos; the compact view makes it easy to look through the whole shoot.
Scene and photo order
Screenshots
Two levels of ordering
First, arrange the scenes. Then, the photos within them.
Scene names, covers and file counts are close at hand in the sidebar. The top toolbar has separate controls for photo sorting and display.
05Covers
Choose your own cover and crop
Visuals automatically uses the first available photo in the scene’s saved order. Its thumbnail also appears in the scene list beneath “Files”. You can pin a different photo and choose which part of it your client will see.
In the scene settings, choose any photo from this gallery or upload a new image from your computer. An existing photo stays where it is; a new upload appears under Unassigned. This also works before the scene contains any files.
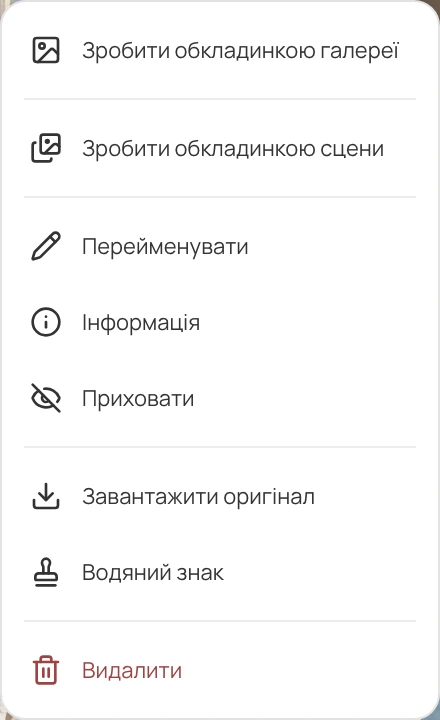
- Open the photo’s menu and click “Set as scene cover”.
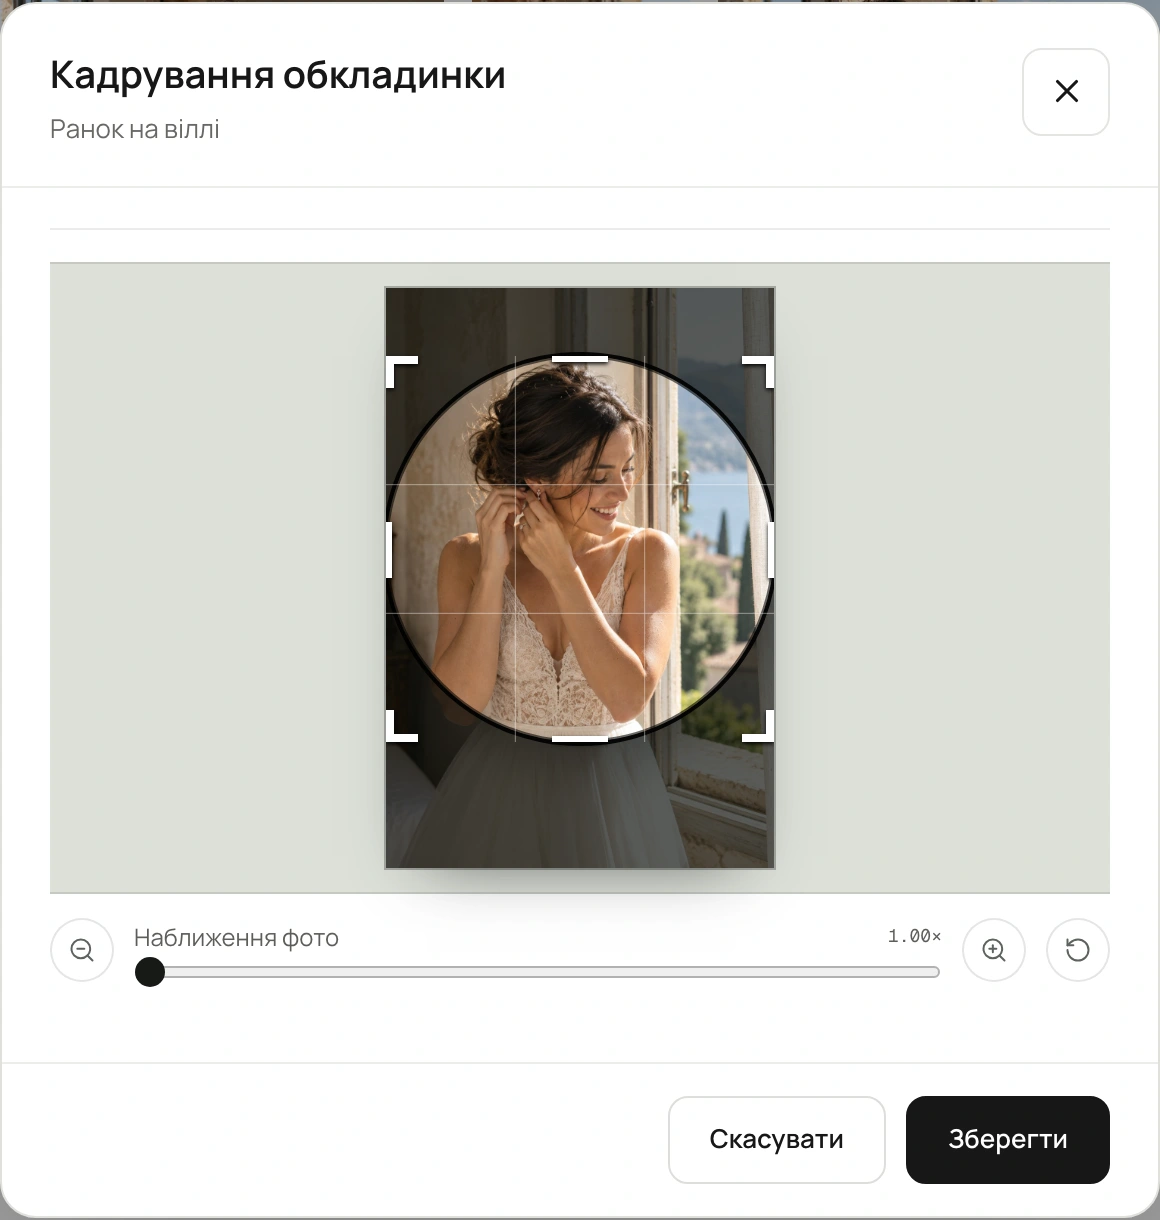
- In the crop window, move the photo and adjust its scale inside the frame.
- Save the result. The chosen photo is marked in the grid and remains the cover when you change the order.
The same actions are available through the settings button beside the scene name: “Choose a photo”, “Adjust crop” and “Use the first photo”. Modern Light uses a circular scene cover; Pure uses a rectangular one. The cover of the whole gallery is set separately.
Your own cover and crop
Screenshots
06Links
Send a link to the exact scene your client needs
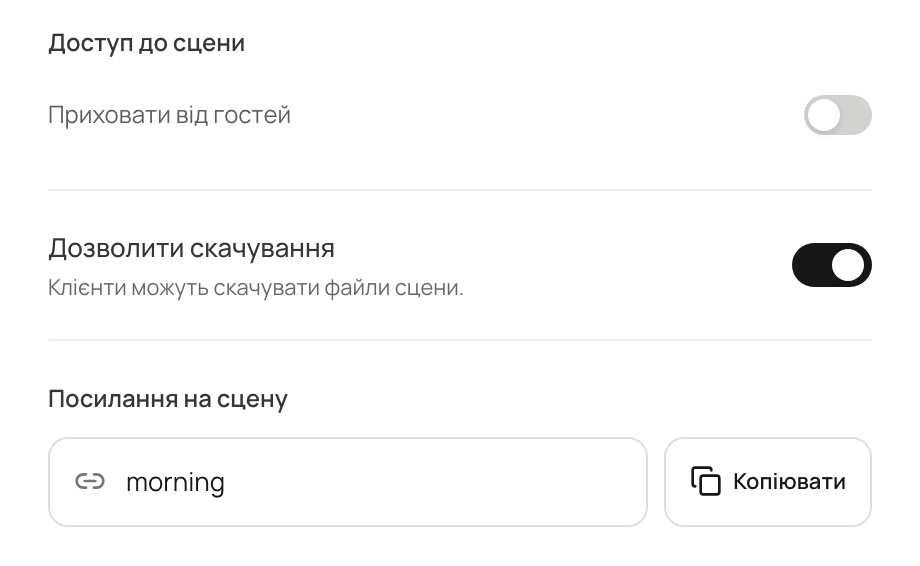
Each scene has its own address within the gallery. Click the link icon in its row to copy that address to the clipboard. Your client opens the gallery at the start of that section.
The editing panel has a “Scene link” block where you can copy the link or change its address name. After changing it, save your settings and send the updated address.
A direct link to a scene
Screenshots

07Access
Set visibility and downloads
Click the settings button in the scene row. The side panel lets you change the section’s name, description, cover, address and access.
“Hide from guests” controls the scene’s guest visibility. “Allow downloads” lets you restrict downloads of its files separately. These settings work together with the gallery’s overall permissions.
A short description beneath the name can add context: “Our walk after the ceremony” or “An evening with our closest friends”. If you do not need a description, leave it empty. No extra space is reserved for it.
Visibility and downloads
Screenshots
08Delivery
Let your client download an individual scene
Parents may want the ceremony, friends the celebration, and the couple portraits for printing. Clients can save an individual scene using the download button beside its name.
- Open the scene and click its download button.
- Check the scene name and file count in the save window.
- Choose the quality and destination: a device, Google Drive or Dropbox.
For a device, Visuals prepares an archive of the selected scene’s files that the client can access. Selecting a scene narrows the download’s contents; the photographer’s permissions still apply.
Saving an individual scene
Screenshots

09The client view
Present your shoot in Pure or Modern Light
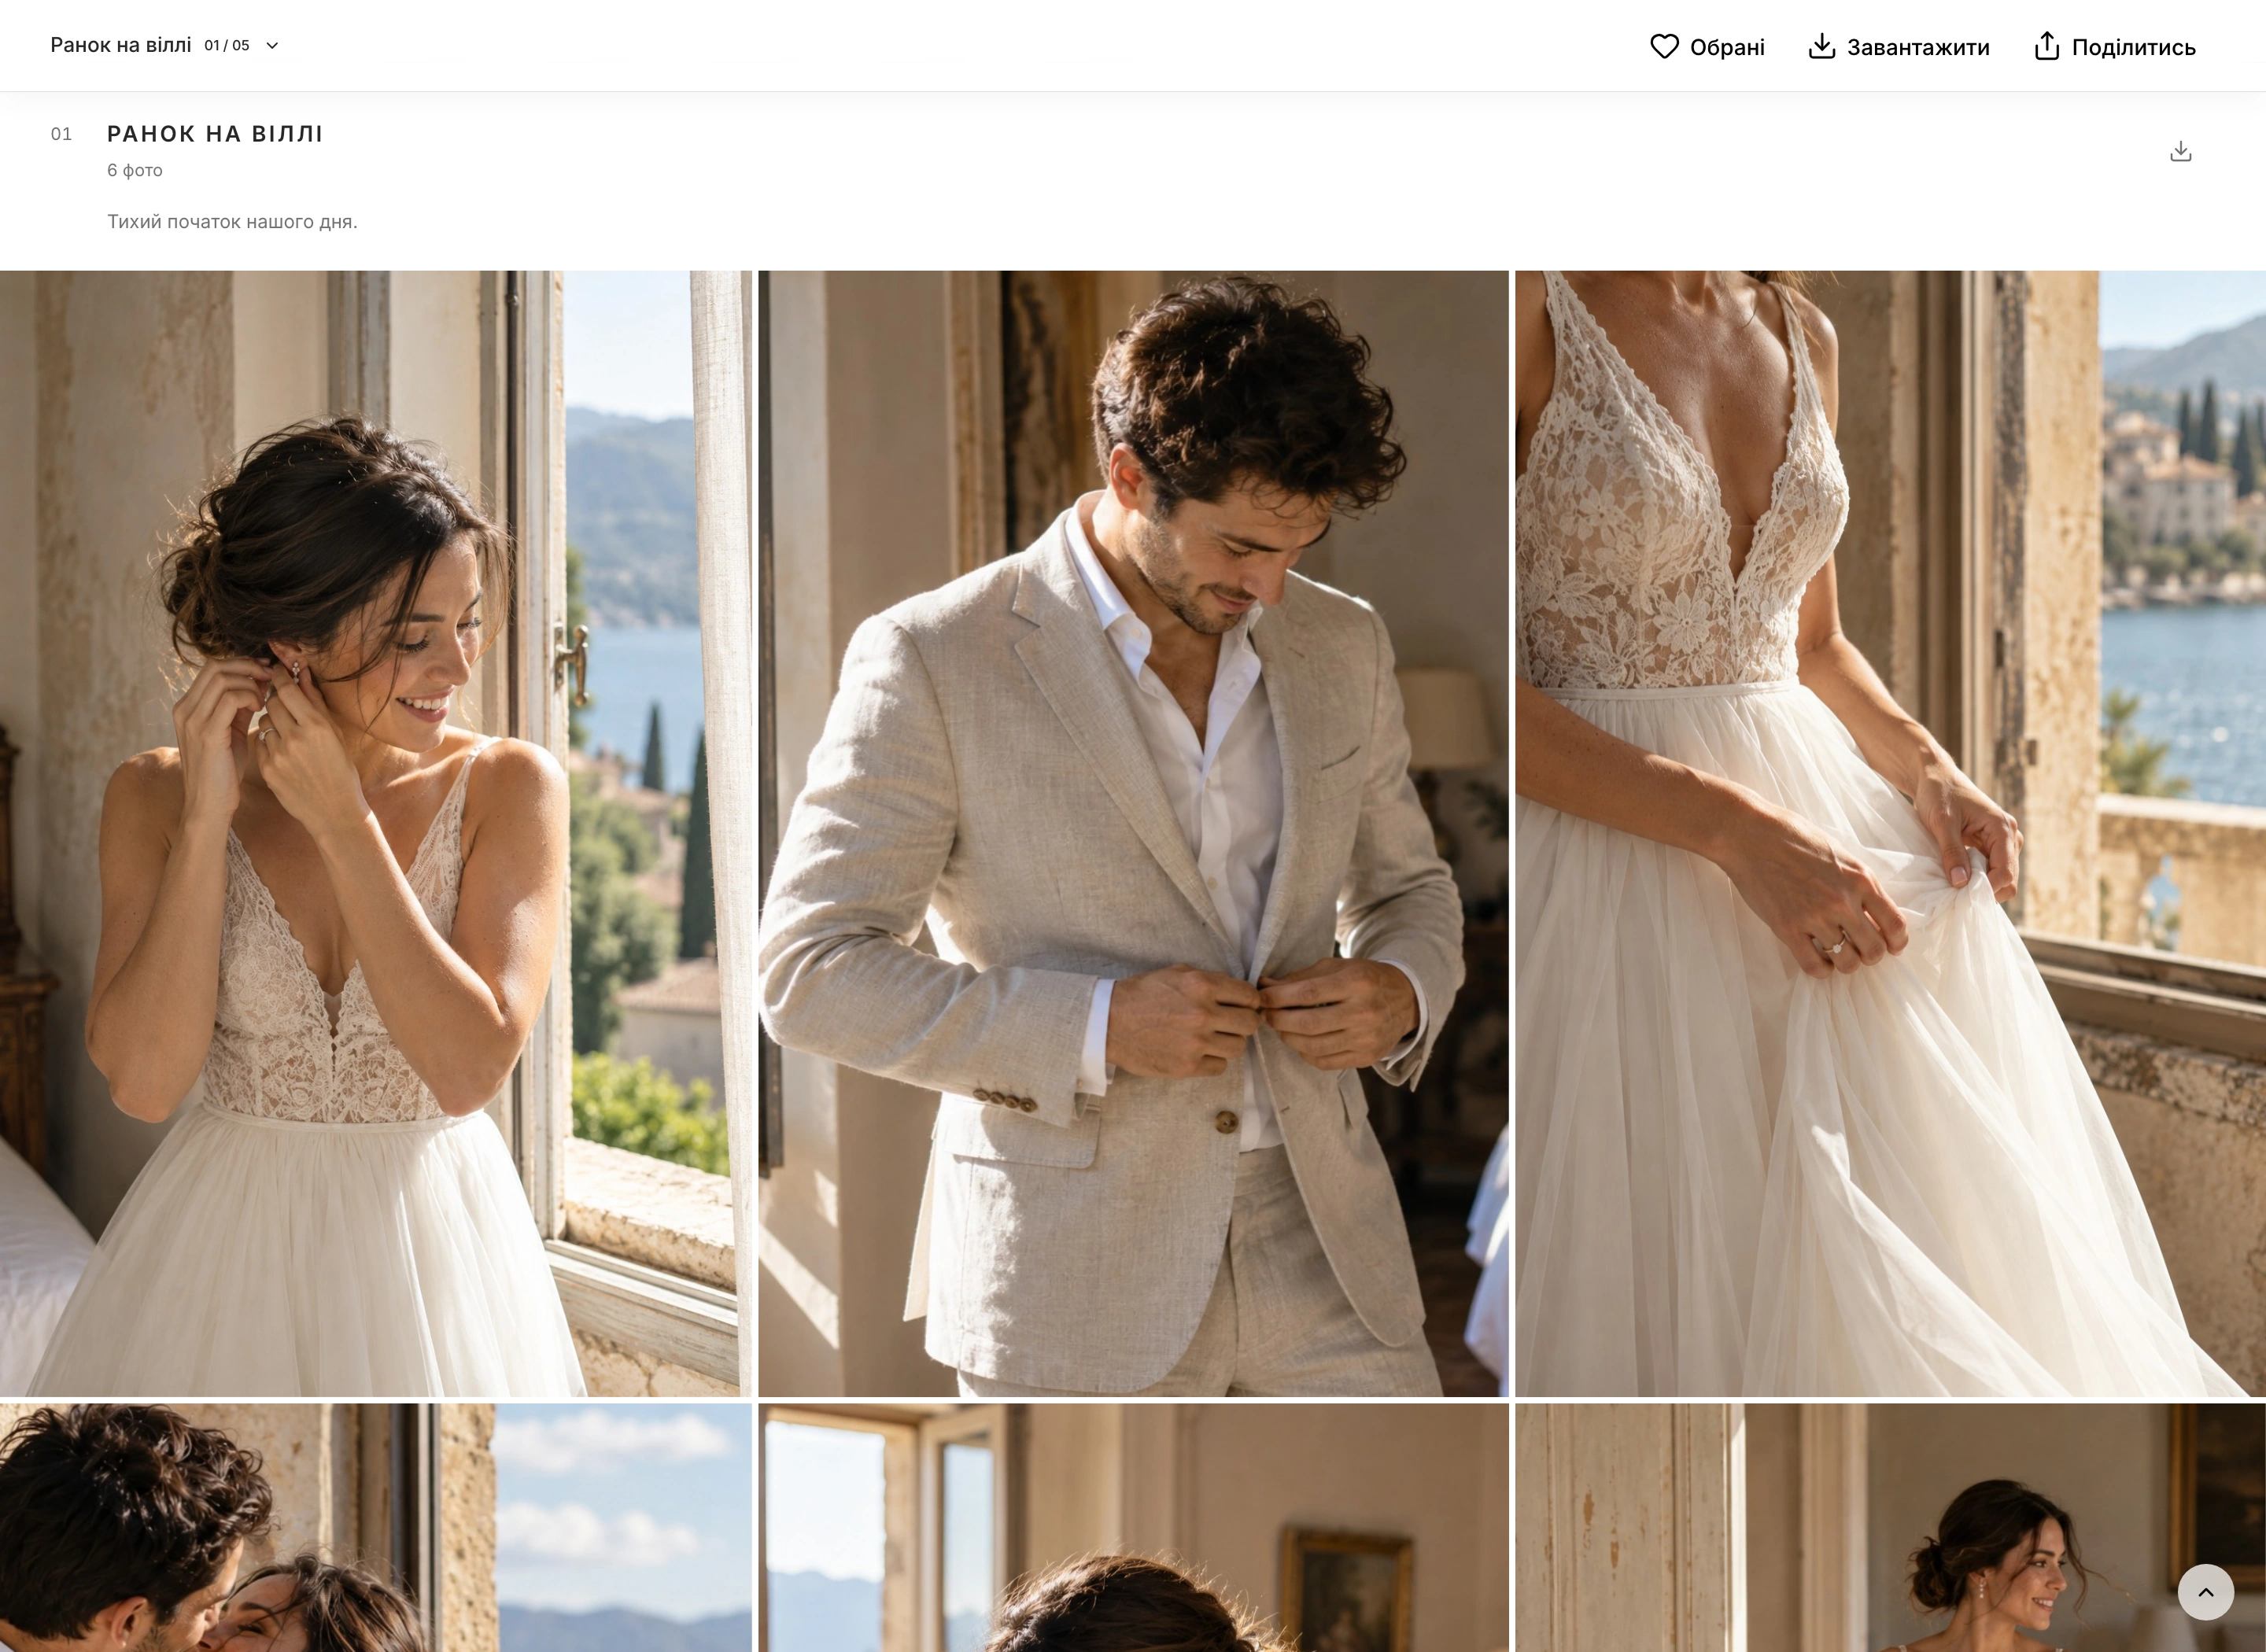
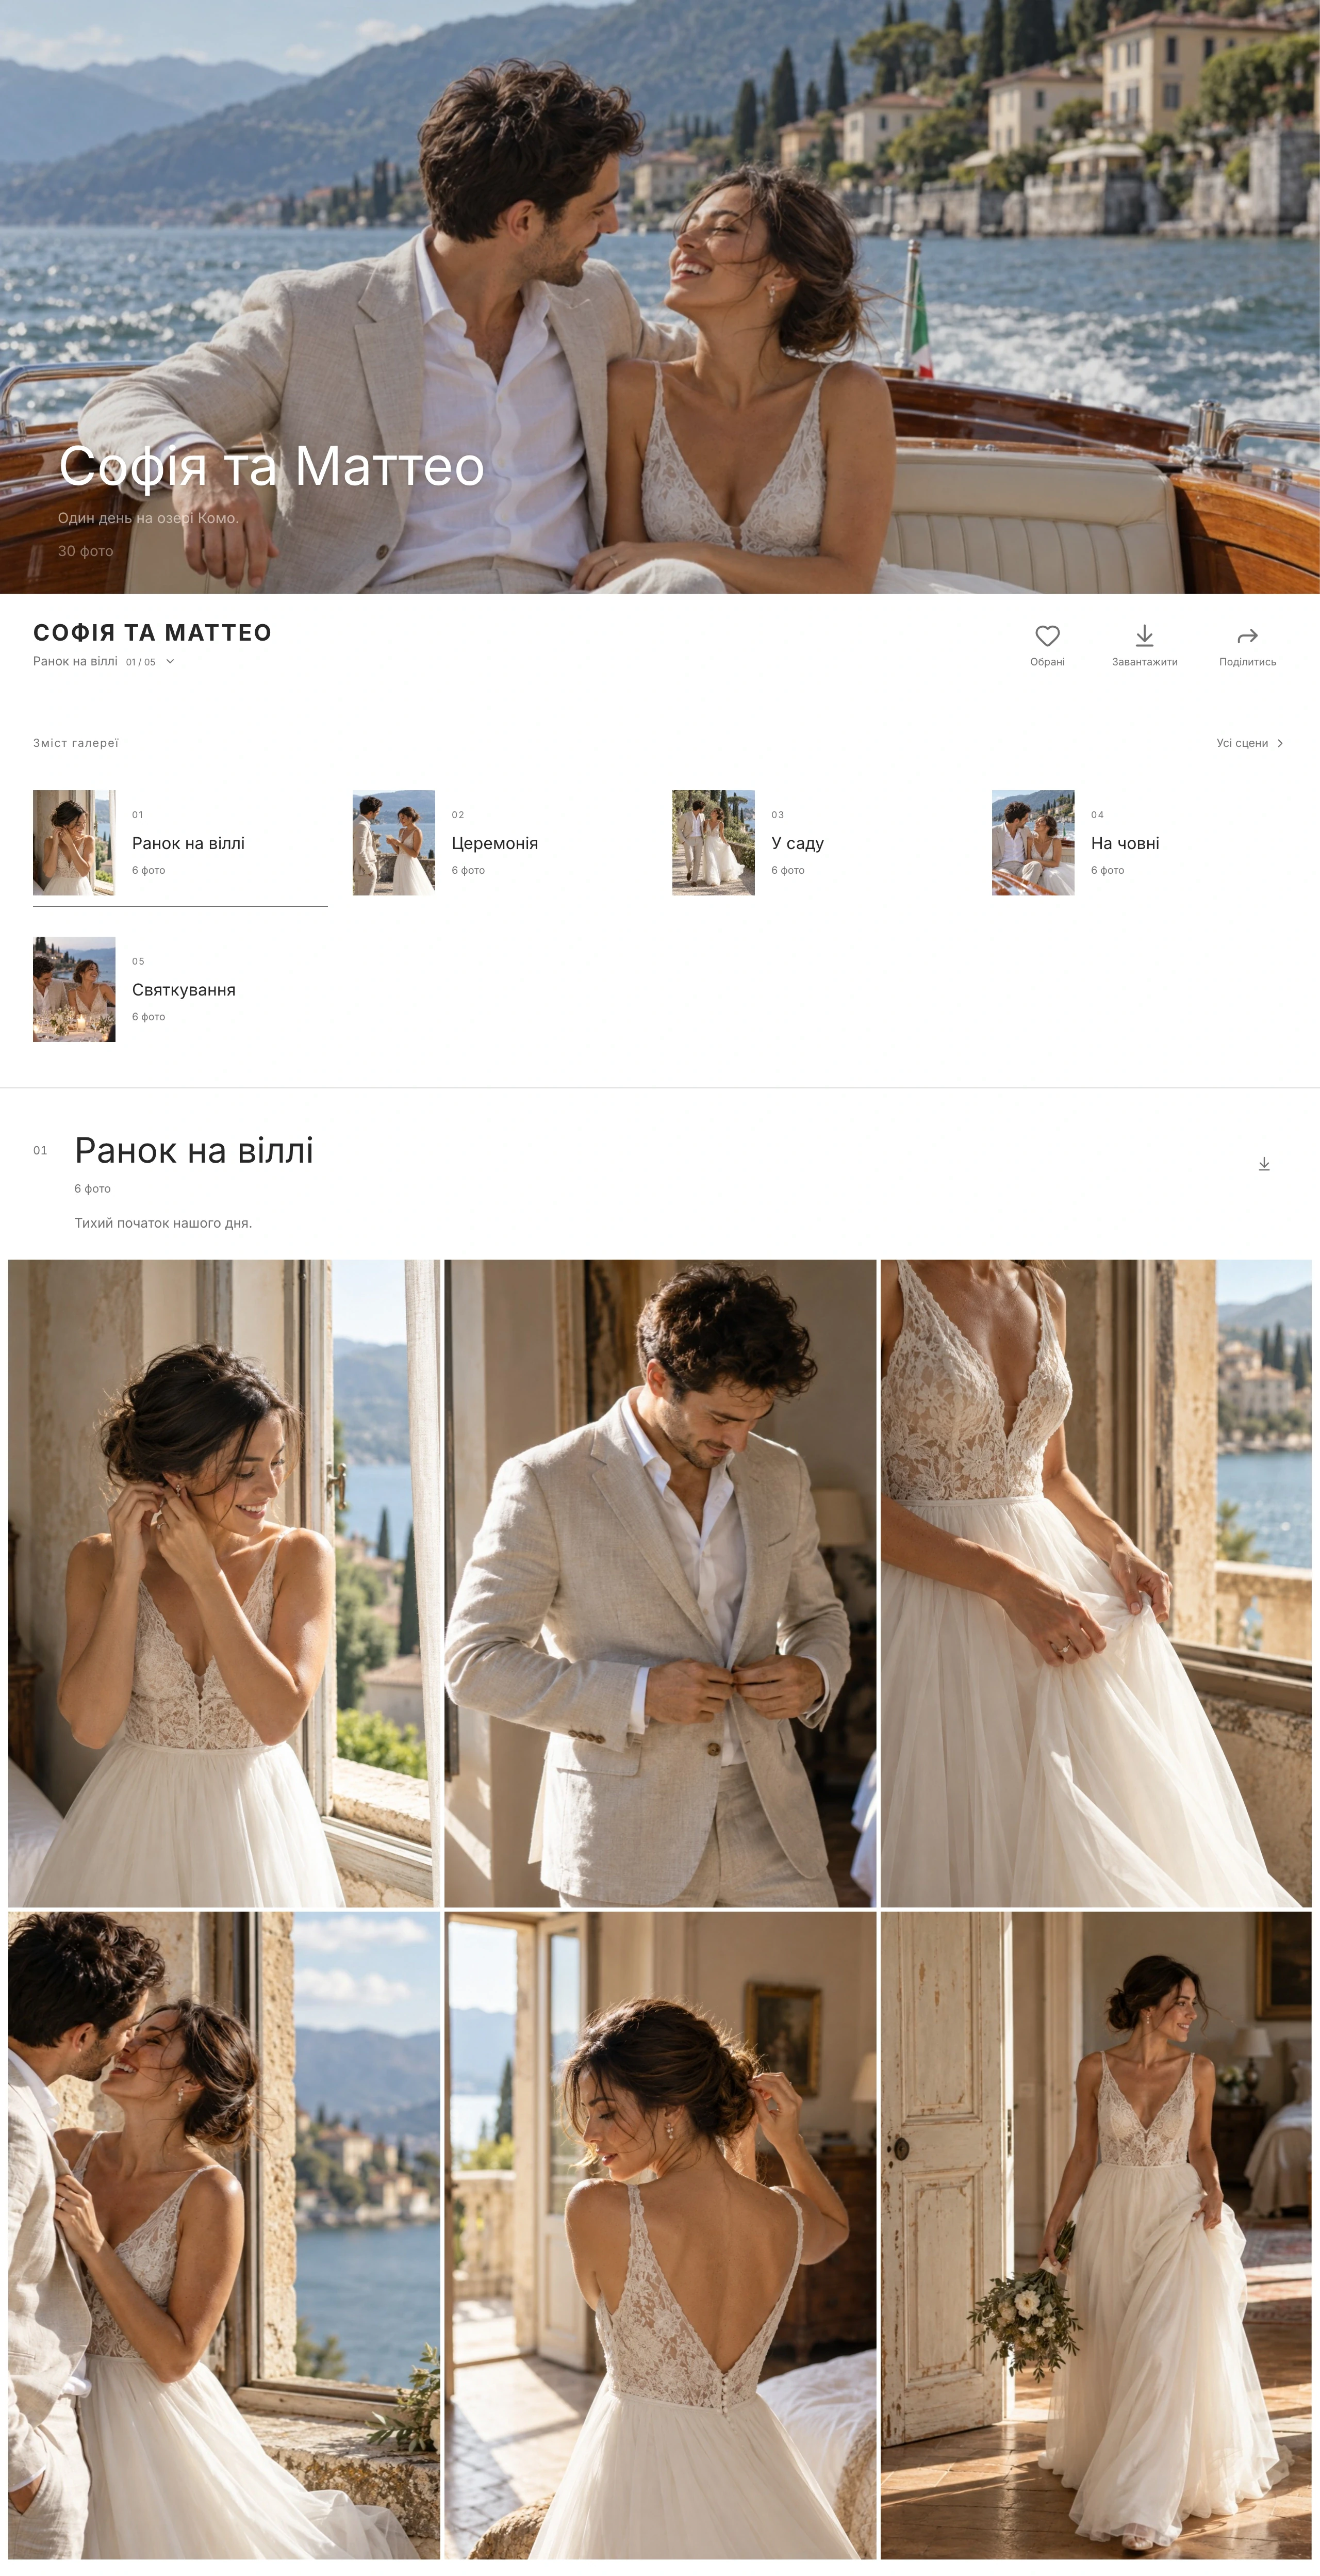
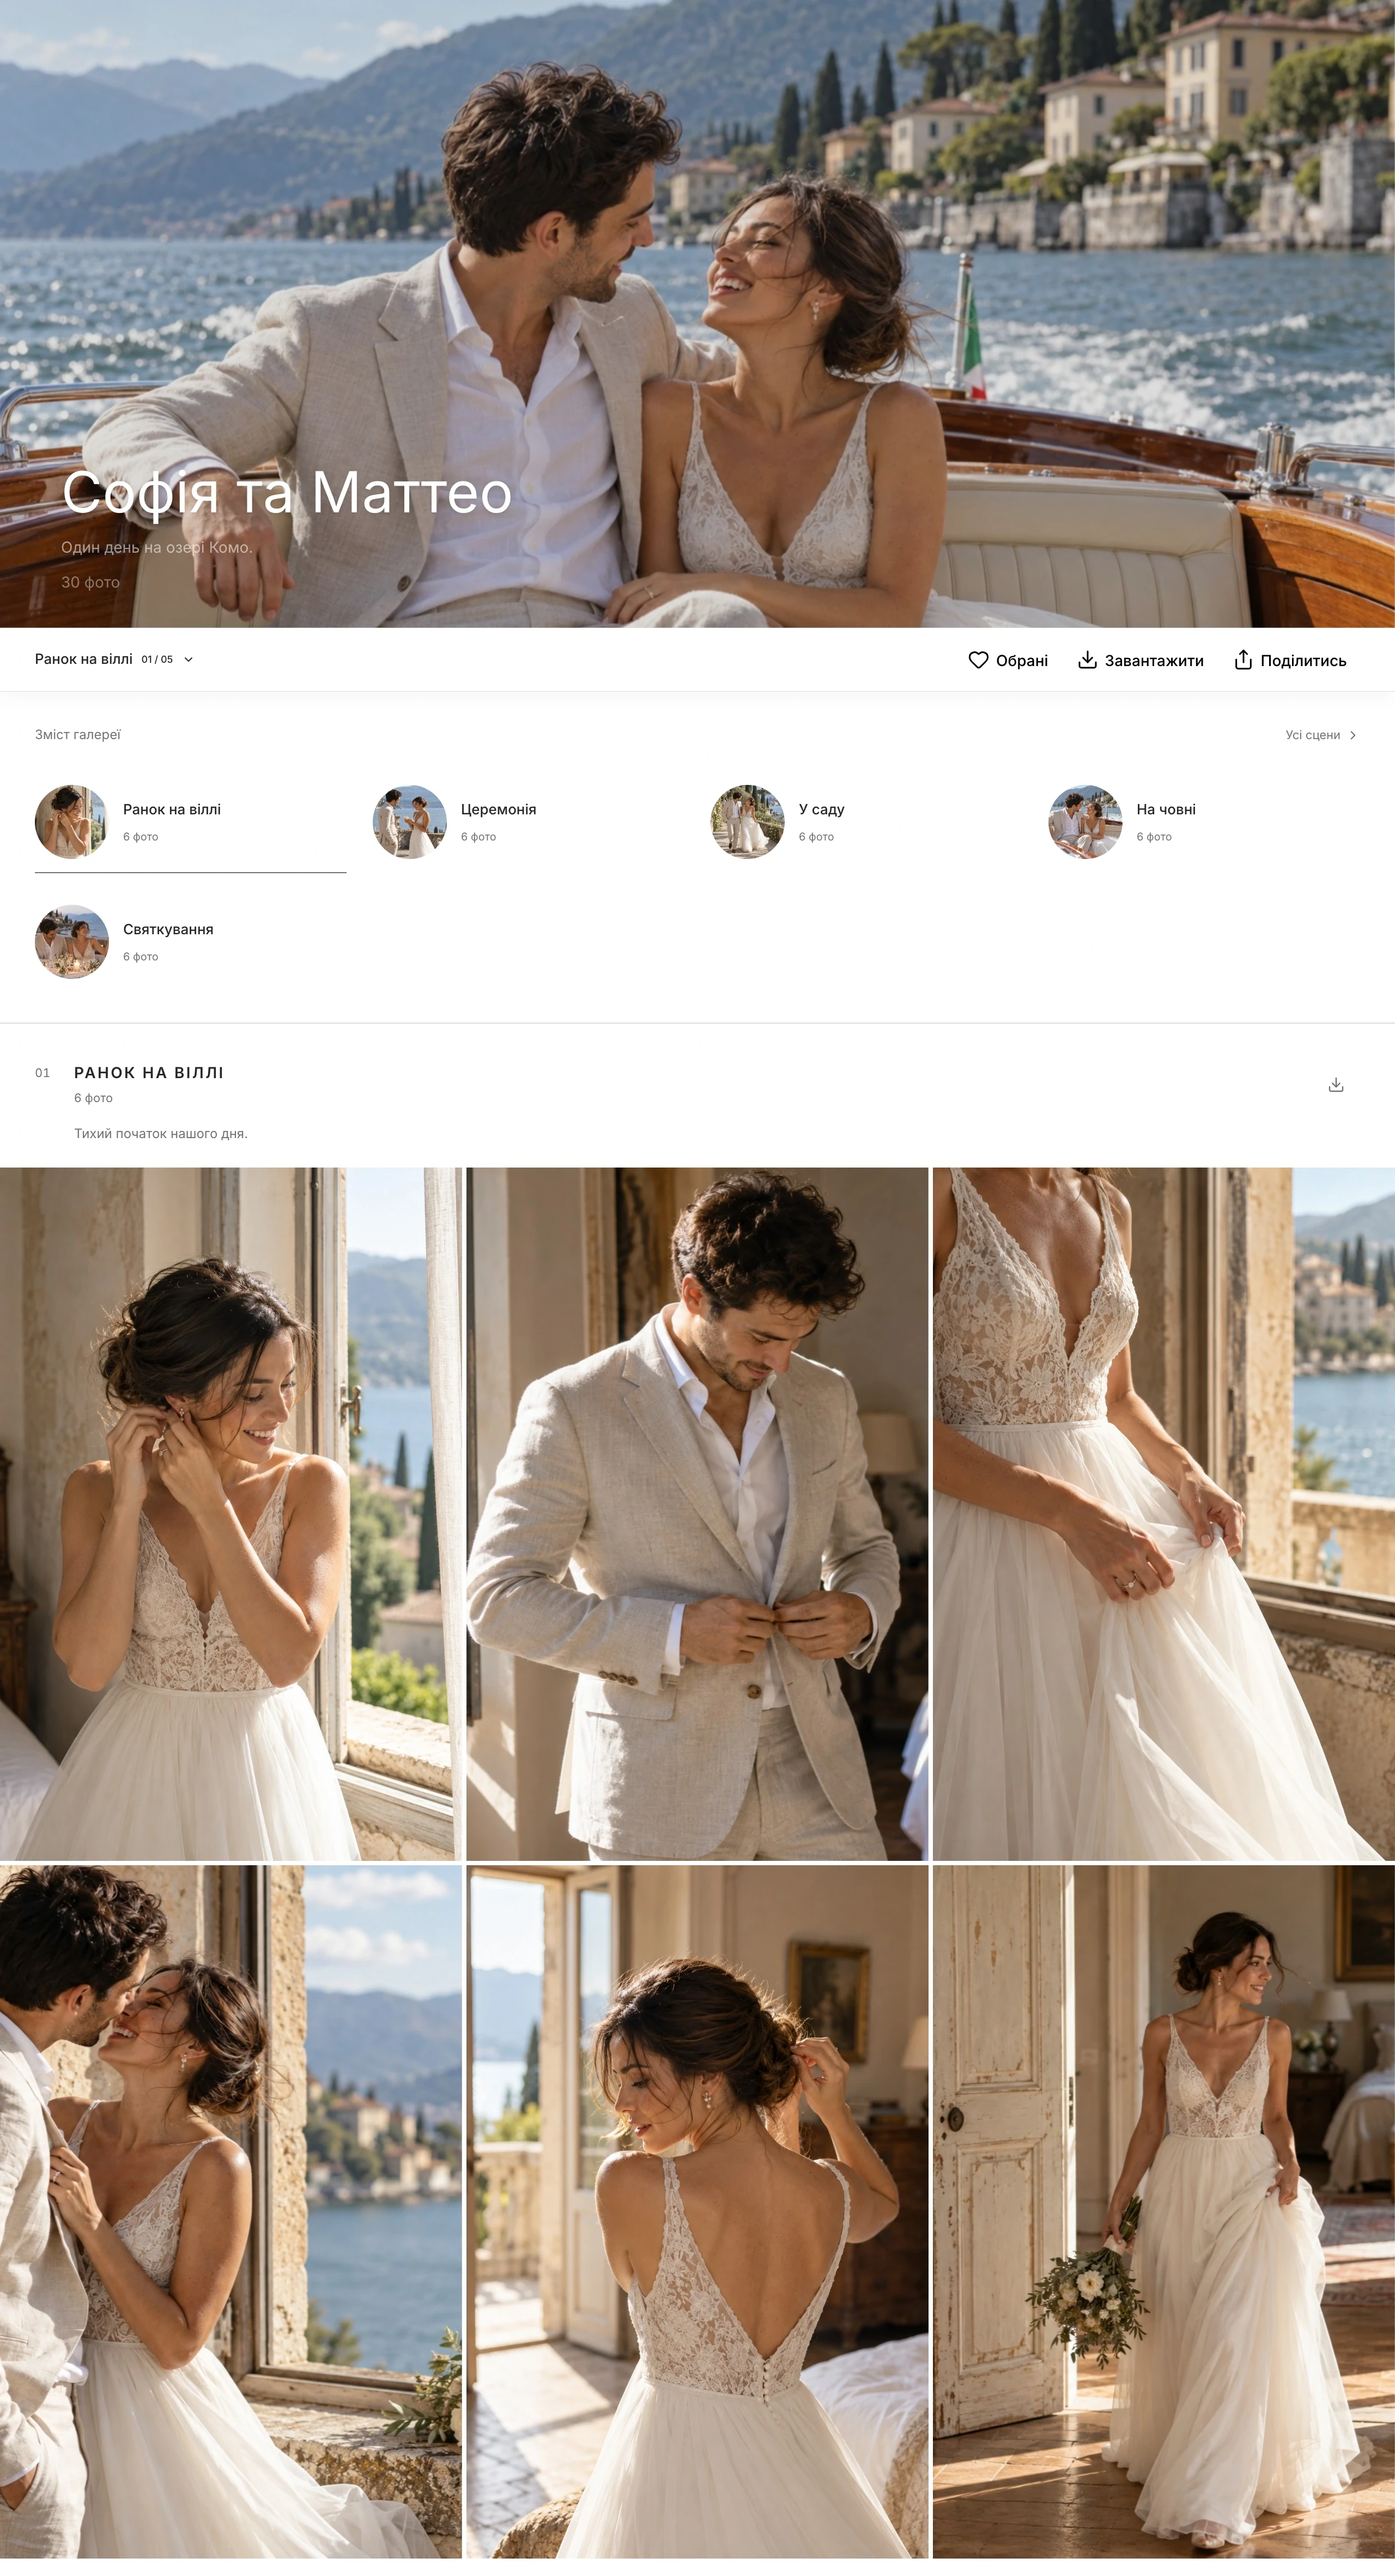
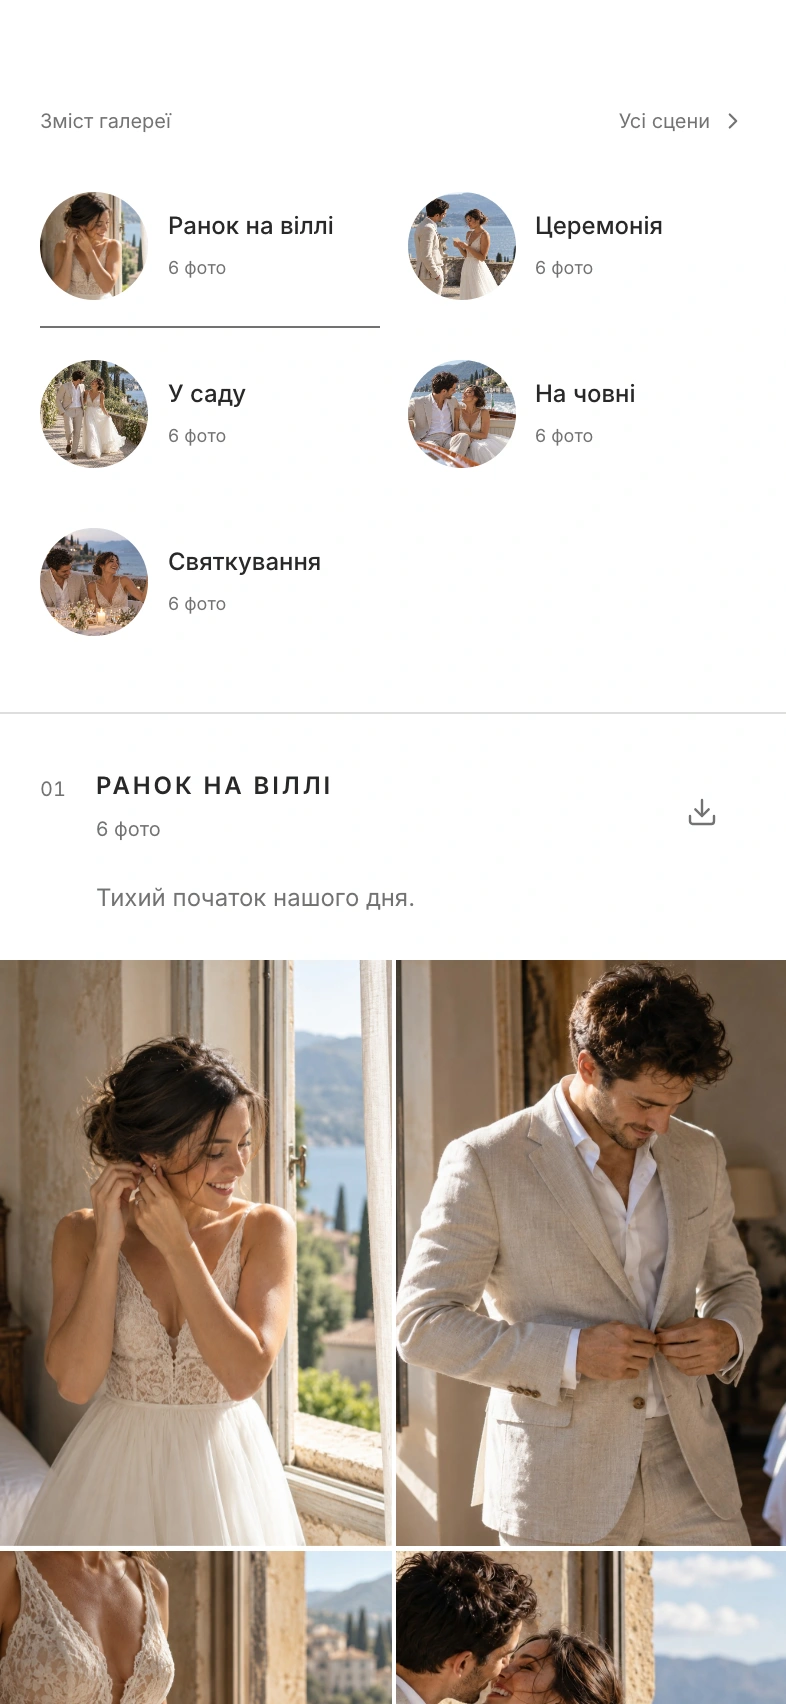
In the client gallery, scenes have their own covers, names and navigation. Guests can jump to a specific section or view the whole shoot in your sequence. The current scene name helps them keep their place as they scroll.
Scenes work in both Pure and Modern Light, on desktop and phone. Photos open in the familiar Visuals viewer; favorites and downloads stay part of the gallery. You can check the presentation in the “Design” tab before sending it to your client.
Pure · desktop
Screenshots
Pure · phone
Screenshots


Modern Light · desktop
Screenshots
Modern Light · phone
Screenshots

Visuals
Technology you can feel in your workflow
Scenes feel easy to use because of specific choices in how Visuals stores, uploads and displays your gallery.
Move photos without uploading the originals again
Moving a photo changes its link to a scene. The file, favorites, selections and history stay attached to the same photo.
Photo counts arrive before the whole shoot loads
Scene counts are delivered separately from the pages of photographs. Clients can see what each section contains while the photos themselves are still loading.
The interface responds immediately and checks that changes are saved
Photos and counts update as soon as you move them. If the change cannot be saved, Visuals restores the previous arrangement and shows an error.
Cover cropping preserves the original photograph
Visuals saves the position and scale of the photo inside the scene cover frame. You can choose the right emphasis for your design while preserving the image itself.
Archives follow the selected scene and the client’s access
The system builds the download for a particular section and the permissions in effect. The structure you create in your workspace also helps when delivering files.
A few more things to know
Can I move several photos at once?
Yes. Select them, then drag any selected photo to another scene or click “To scene” in the bottom toolbar.
Does moving a photo upload it again?
No. It changes which scene an already uploaded photo belongs to. The original and the data attached to that photo are preserved.
Does a scene cover change the cover of the whole gallery?
These are separate settings. Use “Set as scene cover” for a section and the separate gallery cover command for the whole gallery.
How can I leave photos without a scene?
Select the photos, click “To scene” and choose “No scene”. The photographs remain in the gallery.
Where does a scene link lead?
To the section you need within the same gallery. It takes the visitor to the start of the scene and keeps the current access rules in place.
What happens to the files when I delete a scene?
They remain in the gallery without an assignment to the deleted scene. Deleting a scene and deleting its photographs are separate actions.
Give your next shoot its own rhythm
Create a gallery in Visuals, add scenes and go from the first file to a finished story for your client.
Try Visuals